
1.Before You Begin — Your Pilot Has Two Phases
The pilot has two phases. Weeks 1–2: app only — no device yet. Then your Merfi device arrives and you start using it during your child's transitions between events. This is the Phase 1 guide; a separate Phase 2 guide covers your device.
These two weeks capture a "before" picture of how your child handles the transitions between their events, without the device. It's what we measure progress against — one of the most important parts of the pilot. Here's what to do:
2.Install the App
On an iPhone (via TestFlight)
- On your iPhone, open the App Store and install Apple's free TestFlight app (if you don't already have it). TestFlight is what Apple uses to deliver beta apps.
- On your iPhone, tap this invitation link: testflight.apple.com/join/GzTzDsMt
- The link opens TestFlight. Tap Accept, then tap Install (or Update) to put Merfi on your phone.
- Open Merfi from your home screen (you can launch it from TestFlight too) and continue with Create Your Account below.
On an Android phone
- On your Android phone, open this internal test link: play.google.com/apps/internaltest/4701706231579537854. Then continue with Create Your Account below.
- Your email must be added to our tester list first. If the link doesn't work, email contact@getmerfi.com and we'll add you.
3.Create Your Account
- Open the Merfi app you installed in the step above.
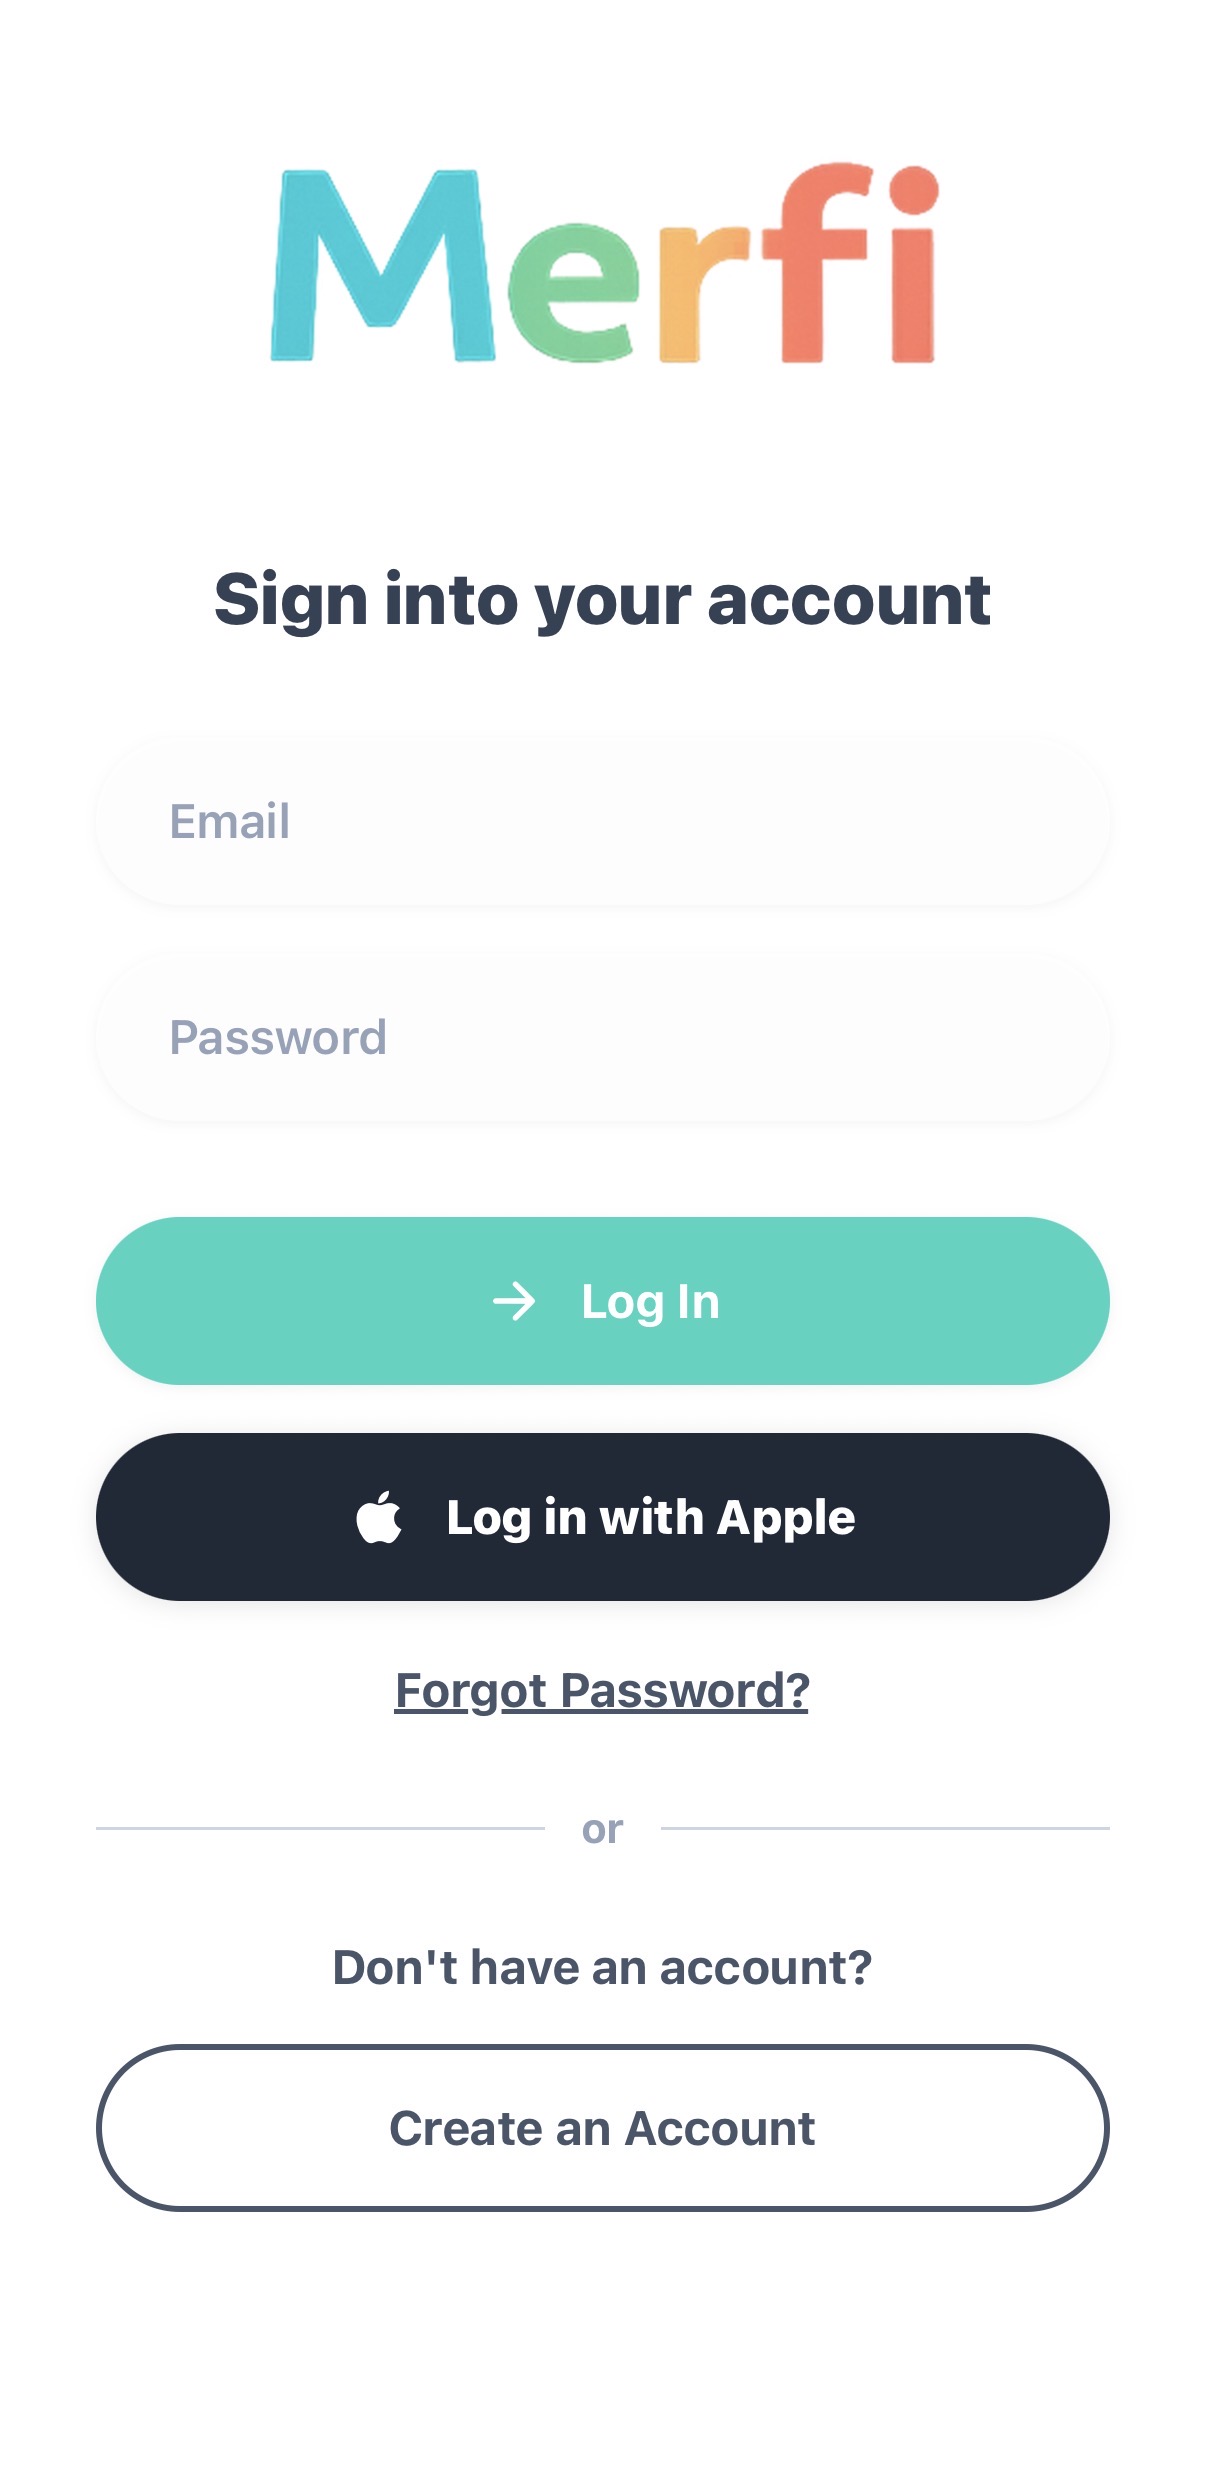
- On the sign-in screen, tap Create Account.
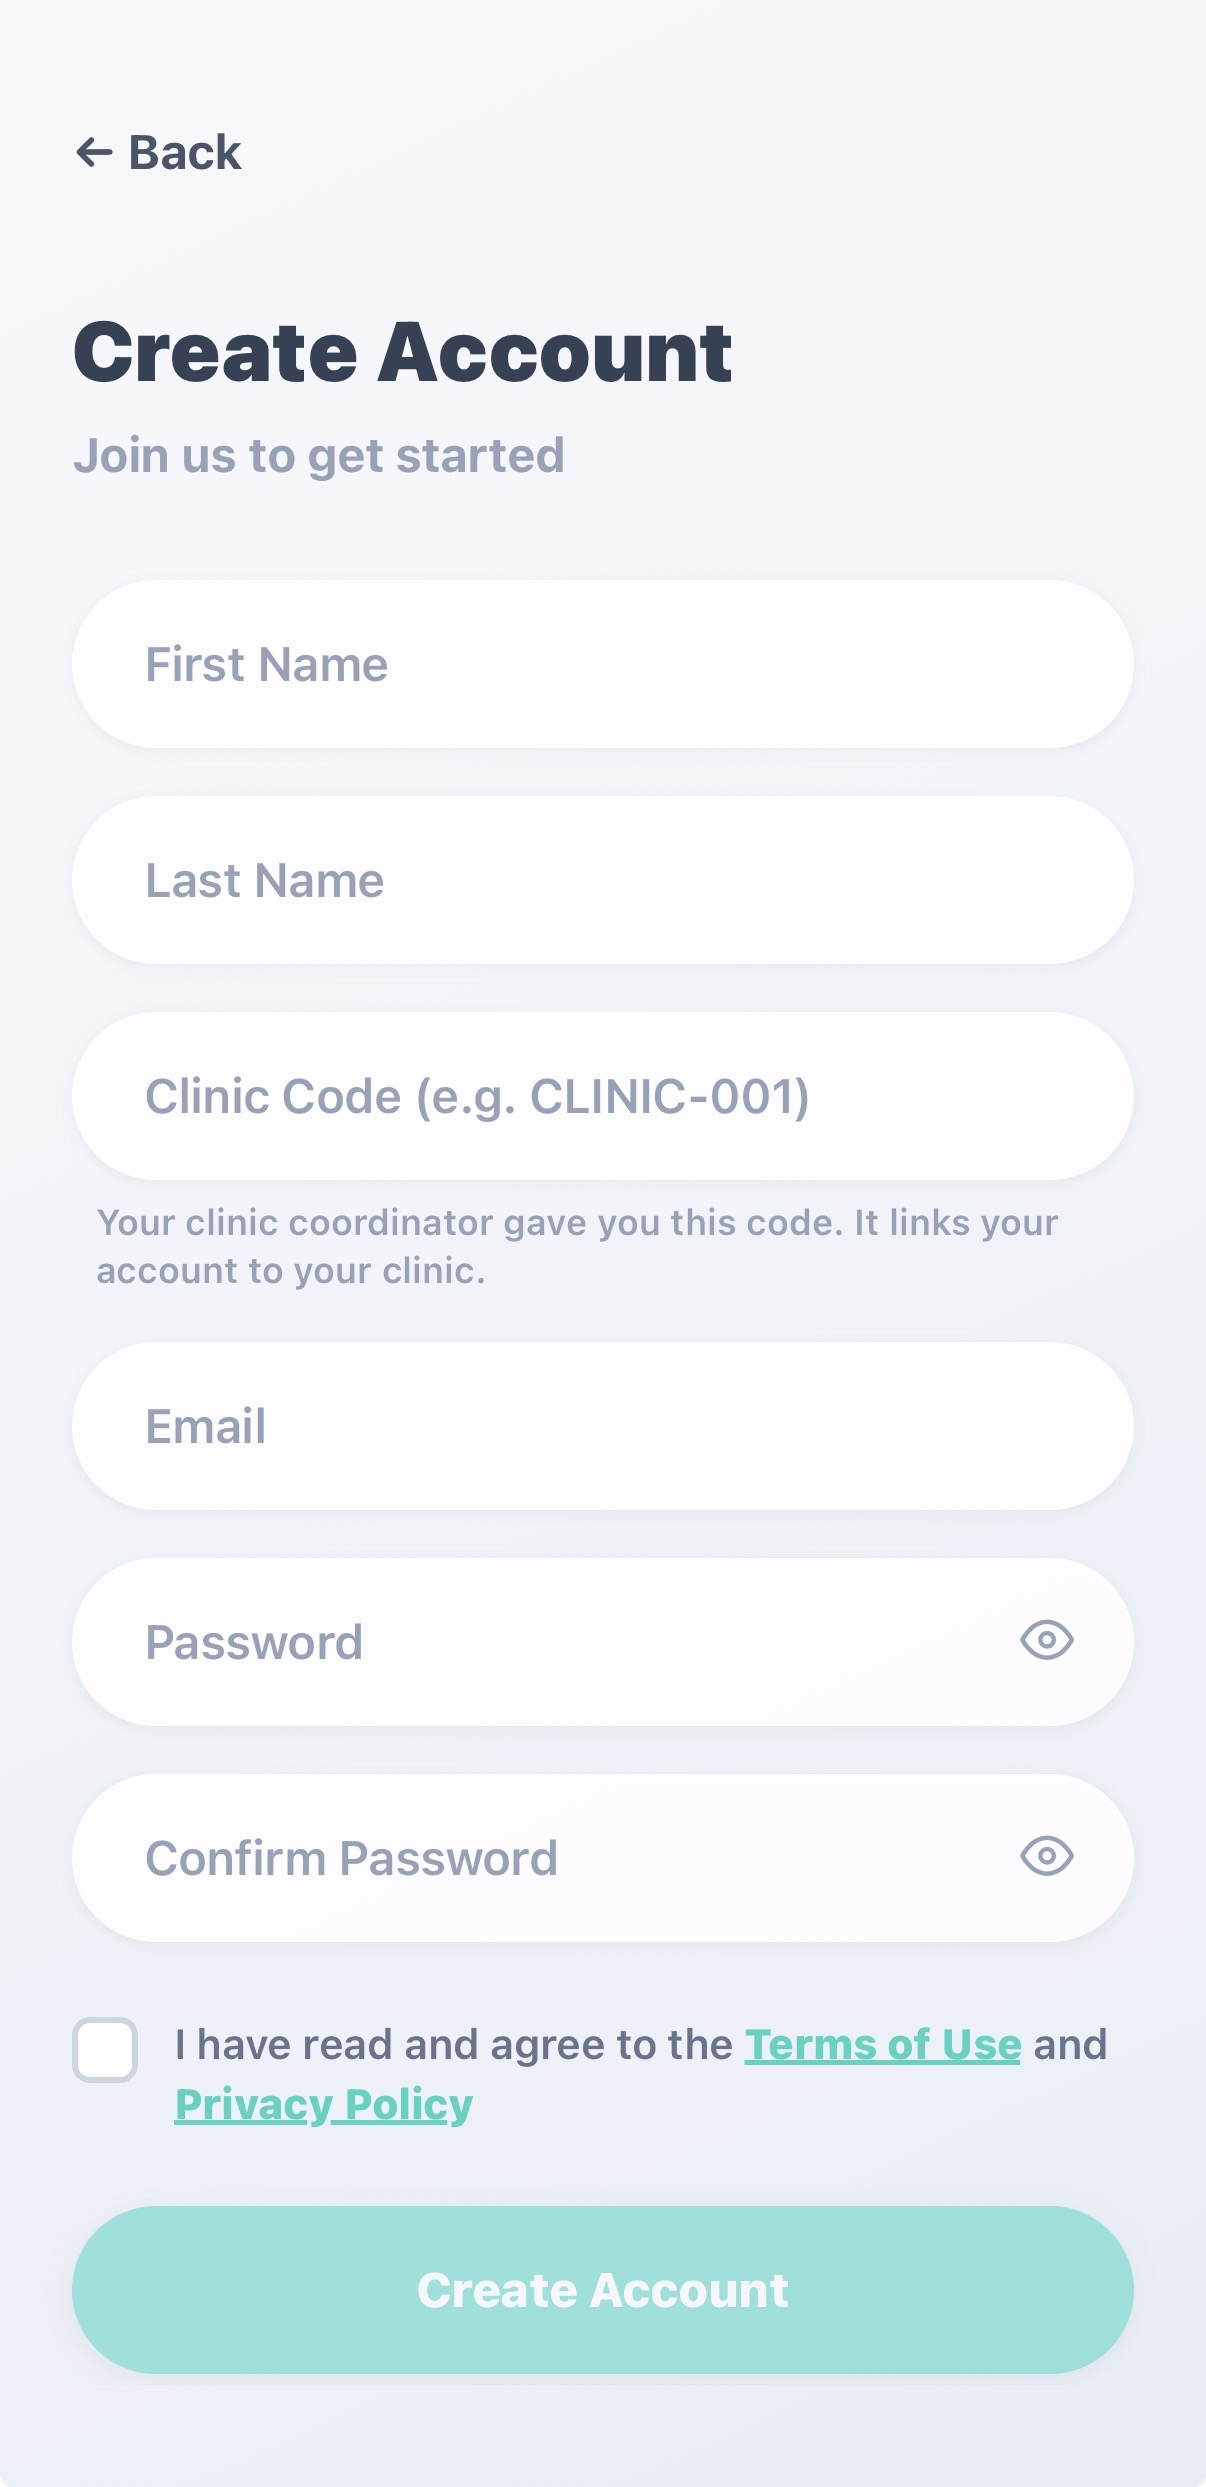
- Enter your First Name and Last Name.
- Enter your Clinic Code: TWCT-001 — this links your account to your clinic. Type it exactly as shown (the app capitalizes it for you). If it isn't recognized, the app will tell you so you can re-check.
- Enter your Email address, then create a Password (at least 6 characters) and type it again in the Confirm Password field.
- Review our policies. Tap Terms of Use and then Privacy Policy to read each one. When you are ready, check the box to confirm you have read and agree to both. You cannot create an account until both are accepted.
- Tap Create Account. Once your clinic code is confirmed, your account is created and you are signed in automatically.
4.Add Your Child's Events
You add your child's daily activities as events — for example Dinner, Bath, or Bedtime. A transition is the move from one event to the next. That's the behavior we observe — and, once your device arrives, the moment Merfi cues your child. Events run on the device automatically, so your phone doesn't need to be nearby.
During the baseline
You won't have the device yet, so the alerts won't play on anything yet. Still add your events and rate each transition afterward. Once your device arrives in Phase 2, these same events drive the cues.
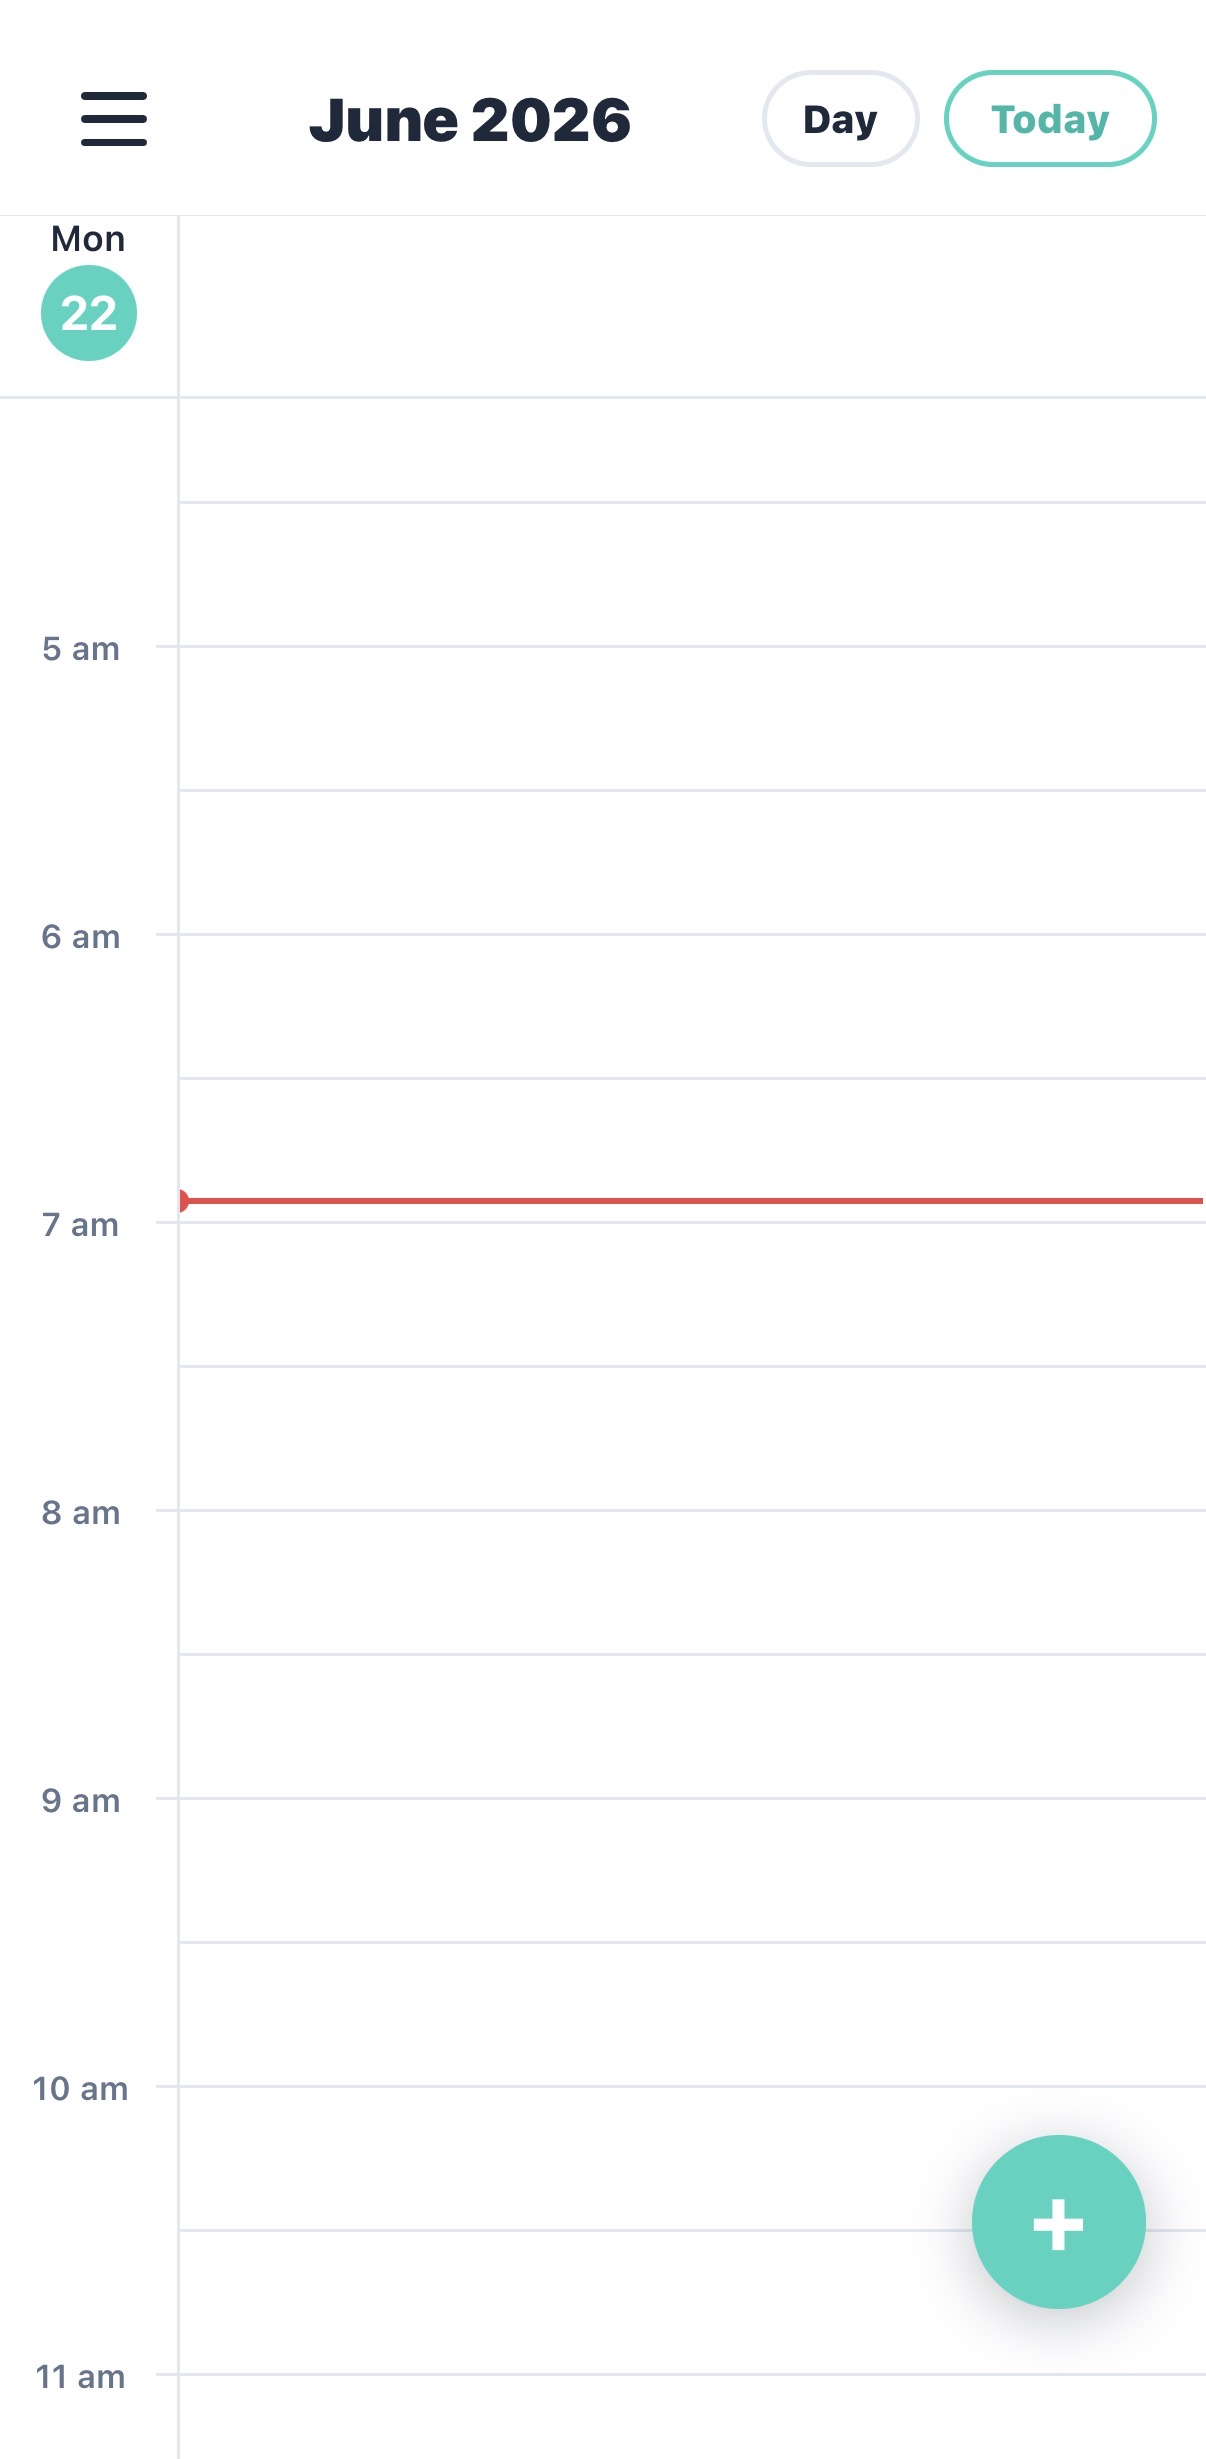
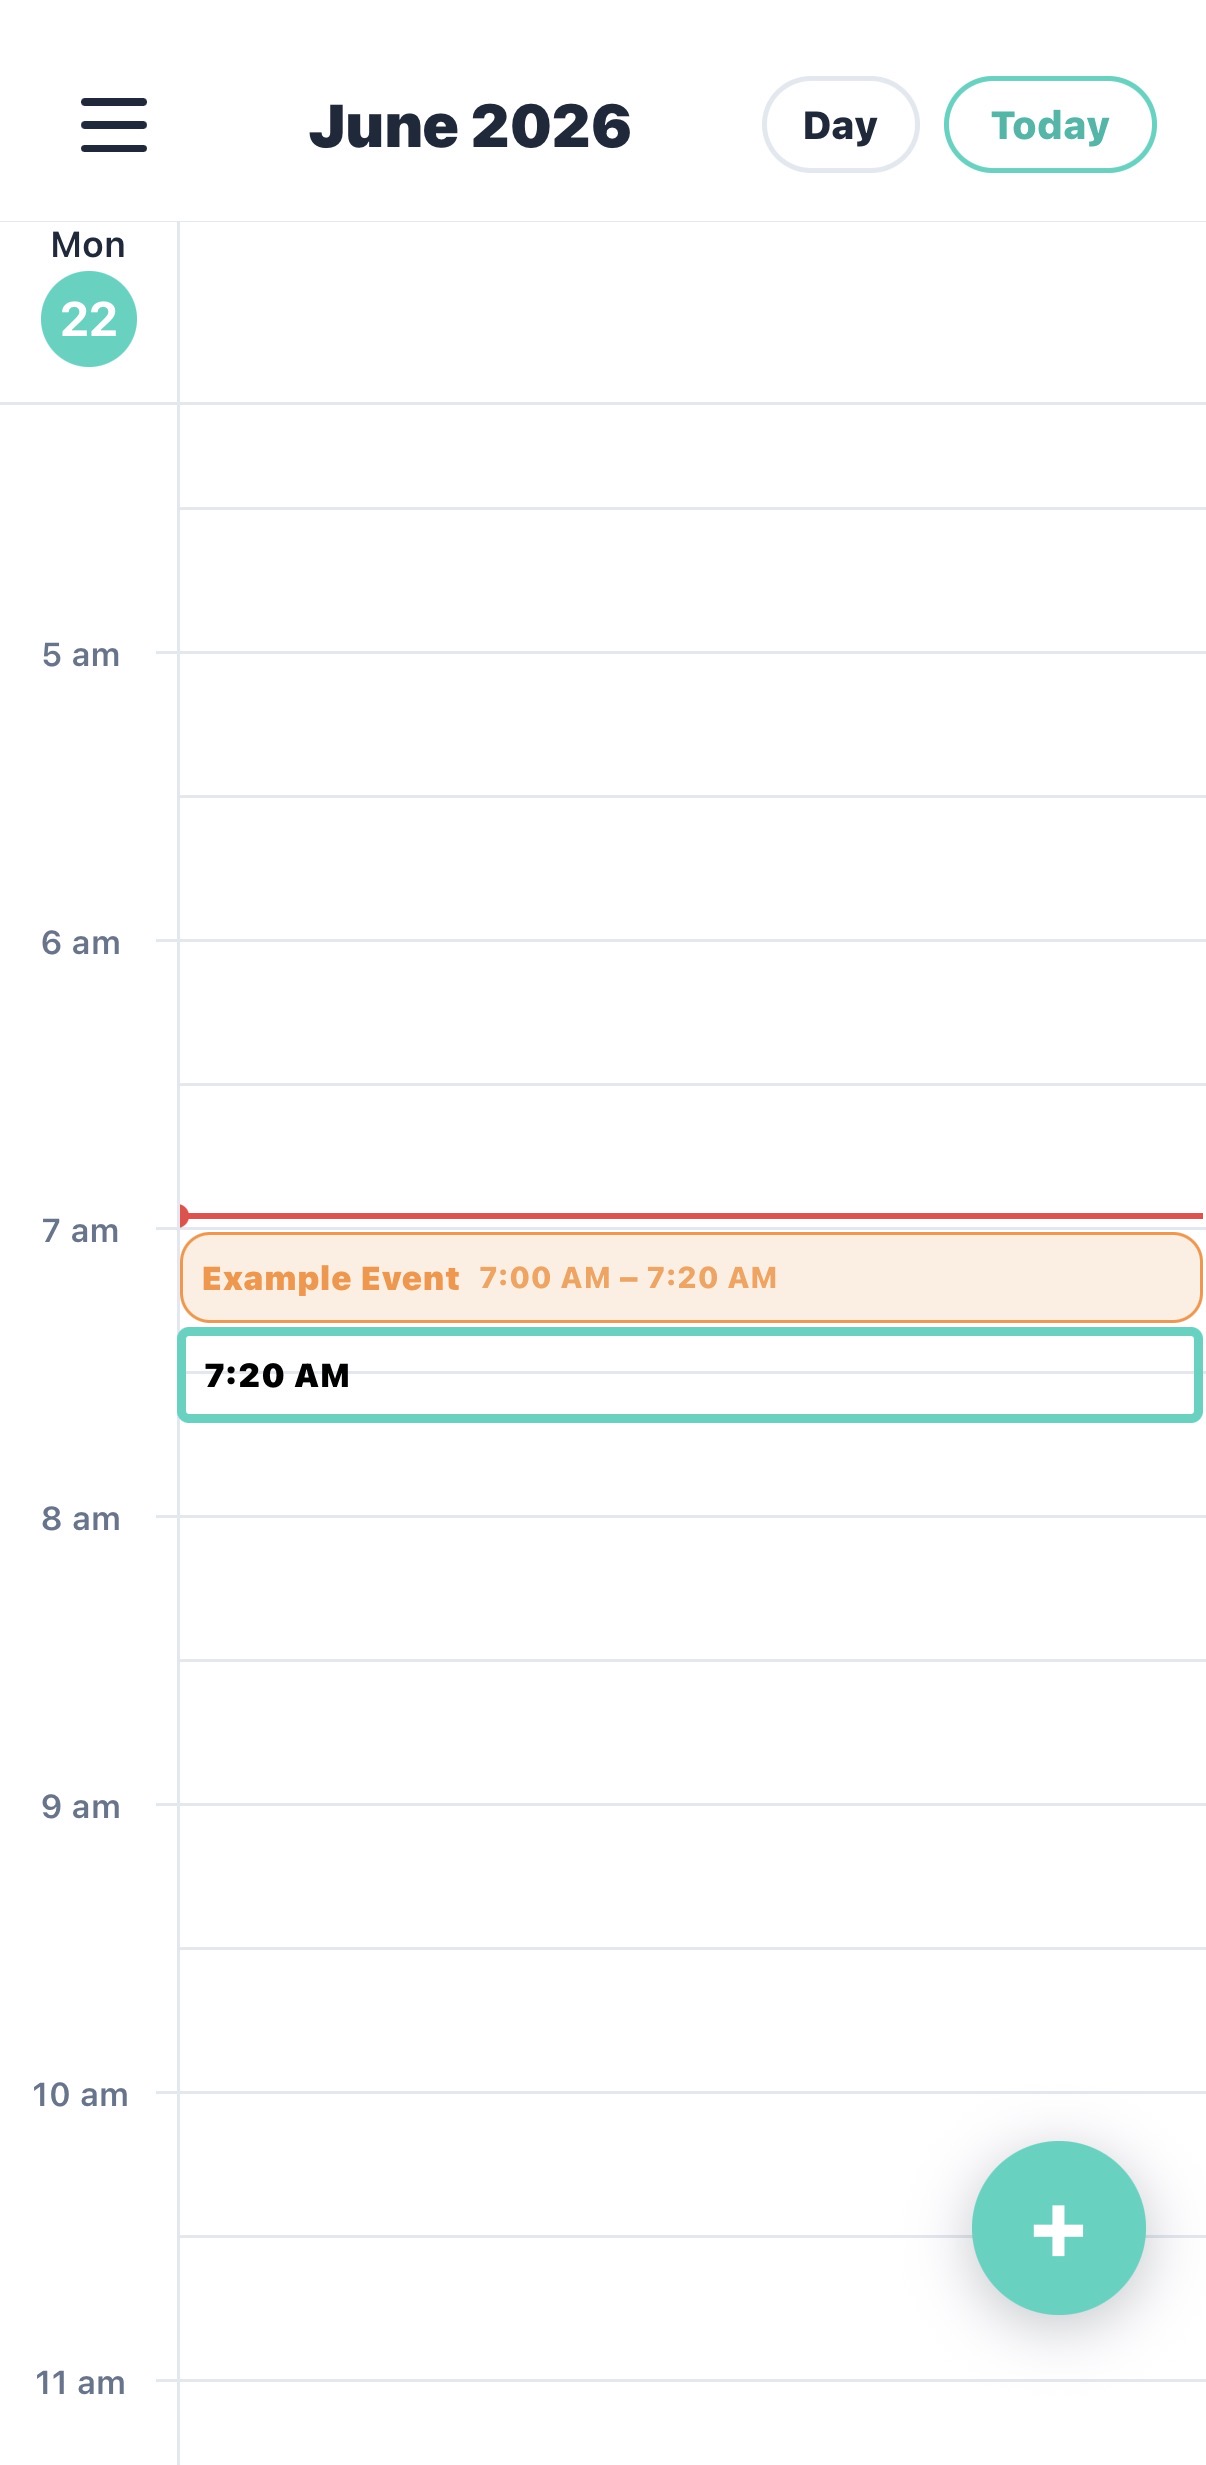
- Open the Merfi app and tap Create Event (or the + button on the home screen).
- Or, right on the calendar, tap and hold an empty time slot to drop a new event, then drag it to the time you want.
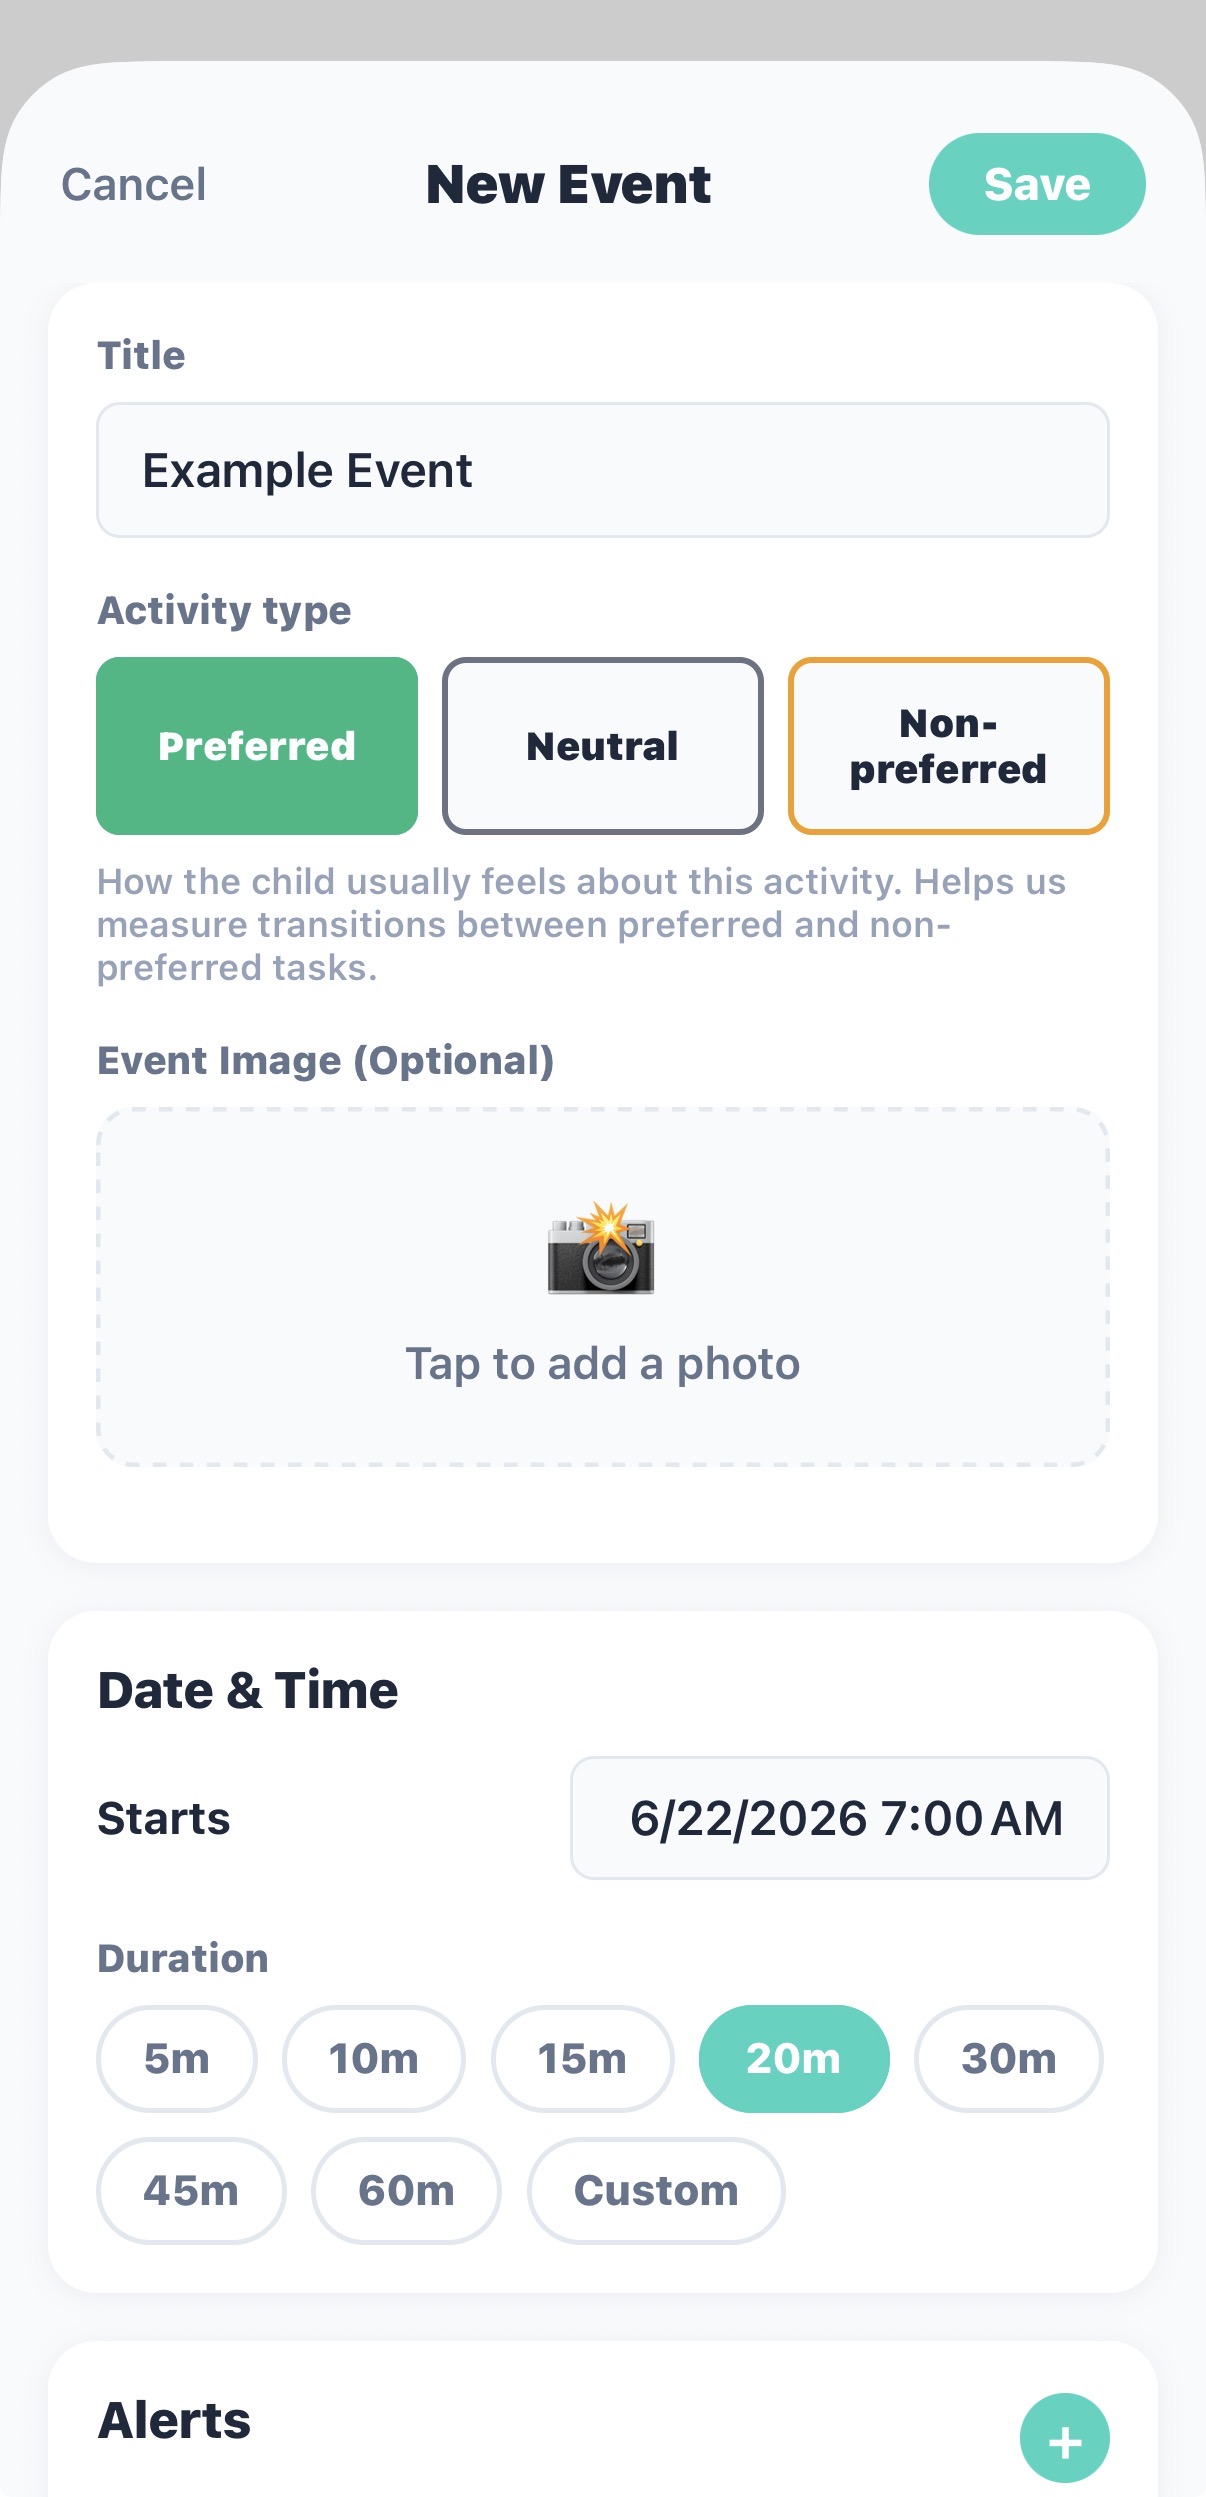
- Enter an Event Name — for example, "Time for Dinner" or "Bedtime."
- Choose the Activity Preference — mark whether the activity your child is moving to is Preferred, Neutral, or Non-Preferred for them. Moving away from a preferred activity is usually the hardest kind of transition, so this tag helps us understand your child's results during the pilot.
- Set the Start Time and End Time for the transition.
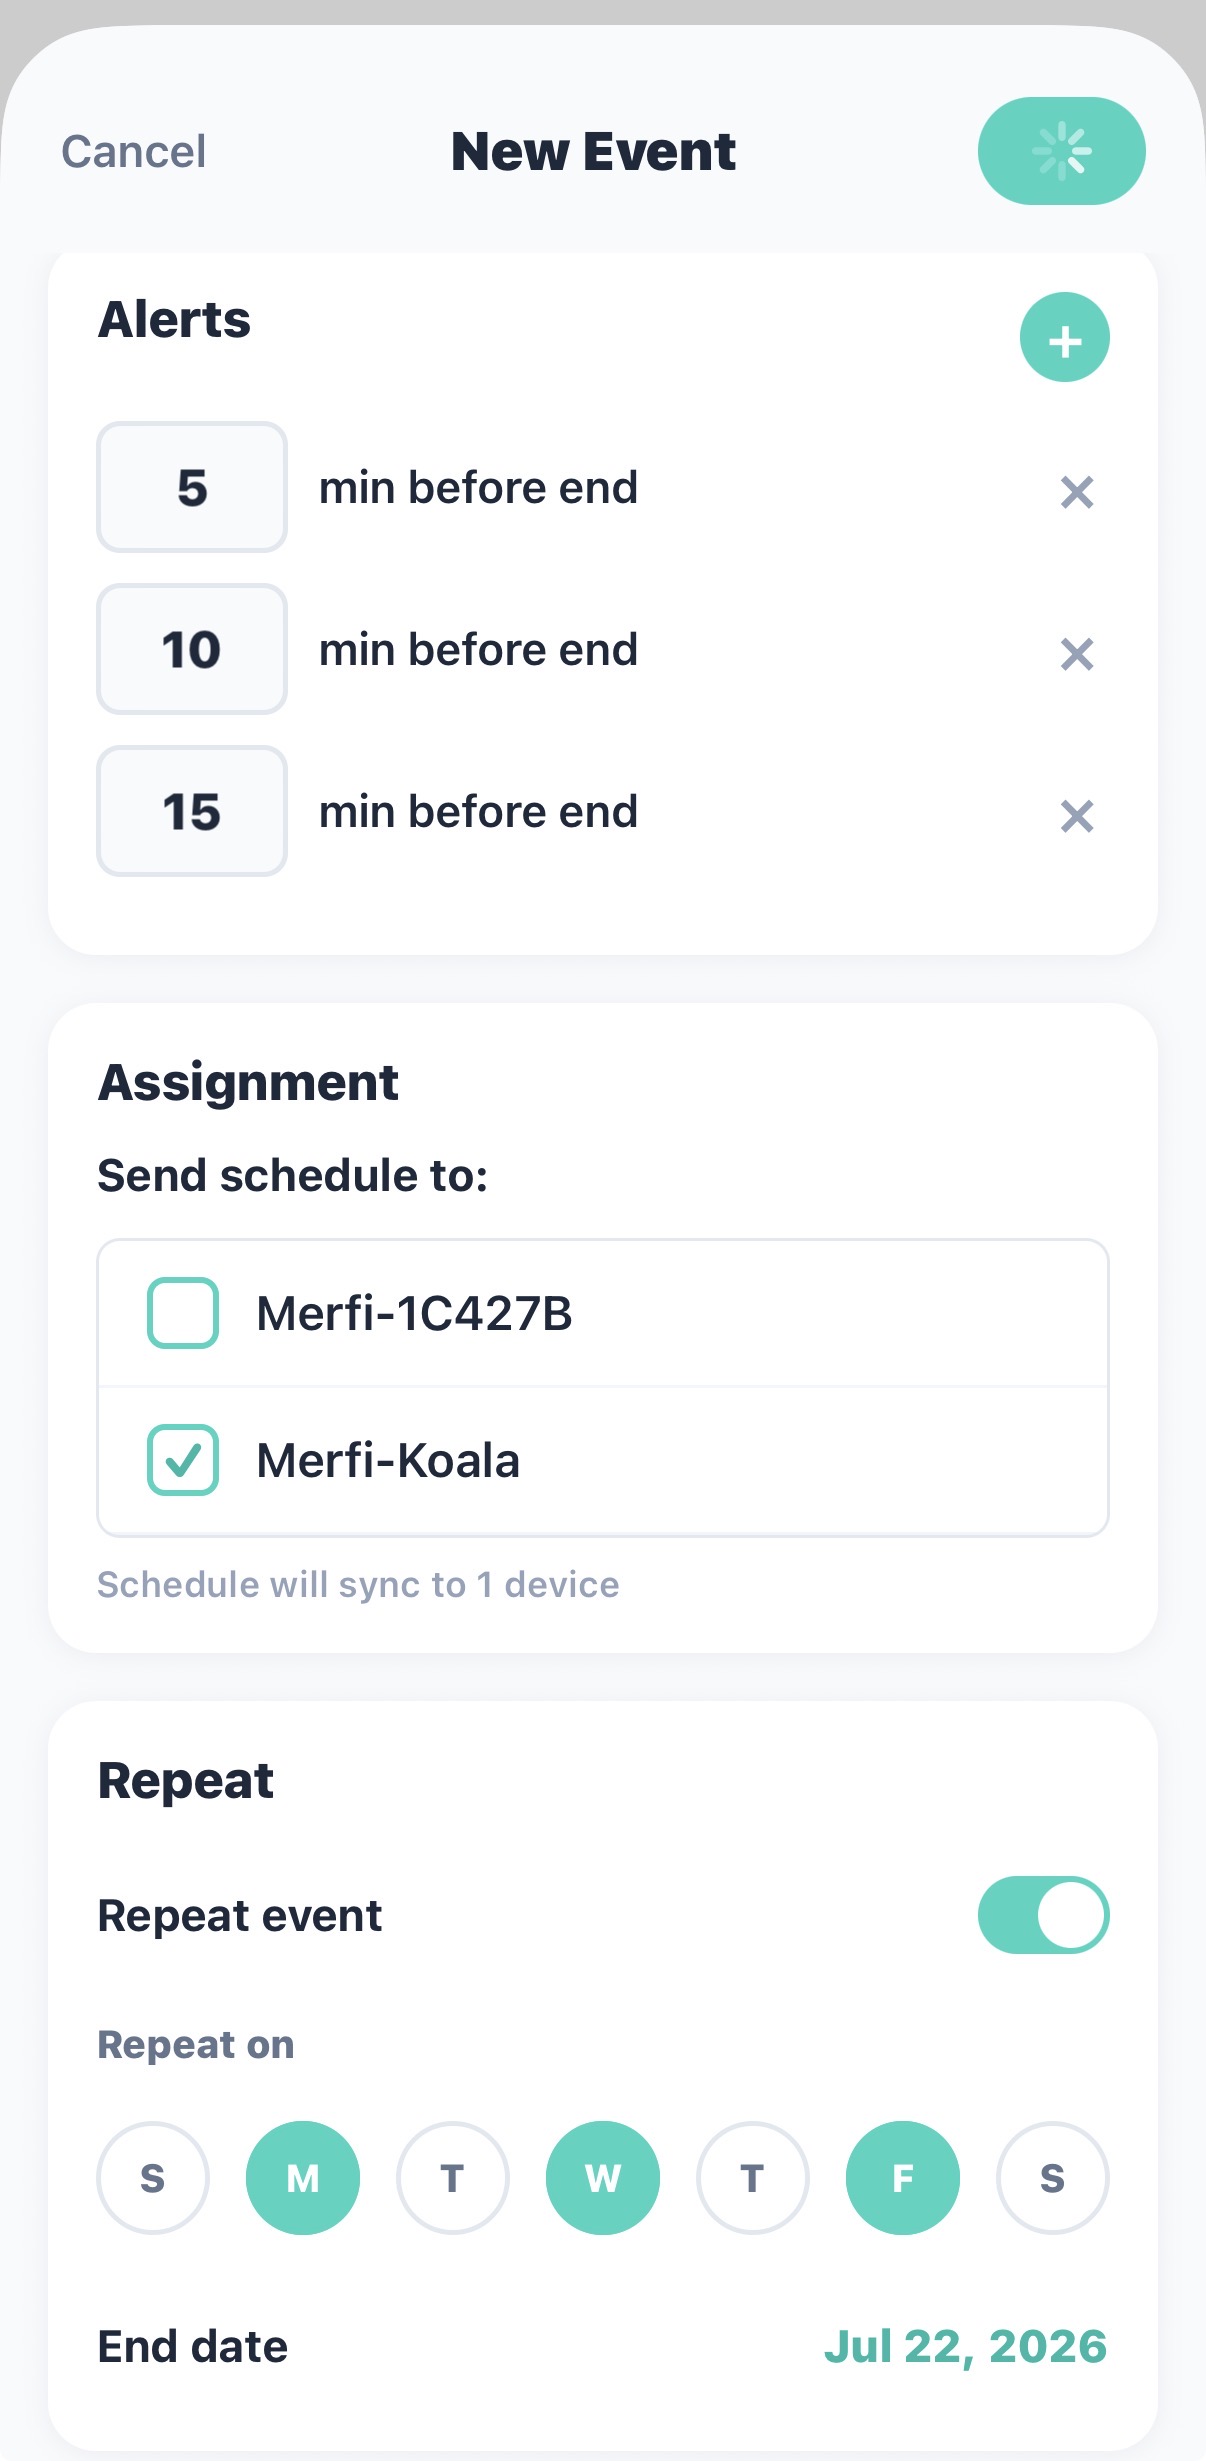
- Set your Staged Alerts — these are the moments before the end time when the device will give your child a heads-up. You choose when each alert fires (for example, 10 minutes, 5 minutes, and 1 minute before the transition ends).
- Each alert automatically plays all three cues — a visual countdown, an audio beep, and a vibration. There's nothing to choose.
- If you have more than one Merfi device connected to your account, select which device should receive this event.
- To repeat an event, turn on Repeat event, choose the days it happens (for example Mon, Wed, Fri), and set an End date. The event and its alerts will repeat on those days automatically.
- Tap Save to send the event to the device.
Reschedule: To move an event, tap and hold the existing event on the calendar and drag it to a new time.
Note: You can't add a photo to an event yet — you can skip the "Tap to add a photo" option for now. We're building this feature and it's coming to the device soon.
5.Rate How Each Transition Went
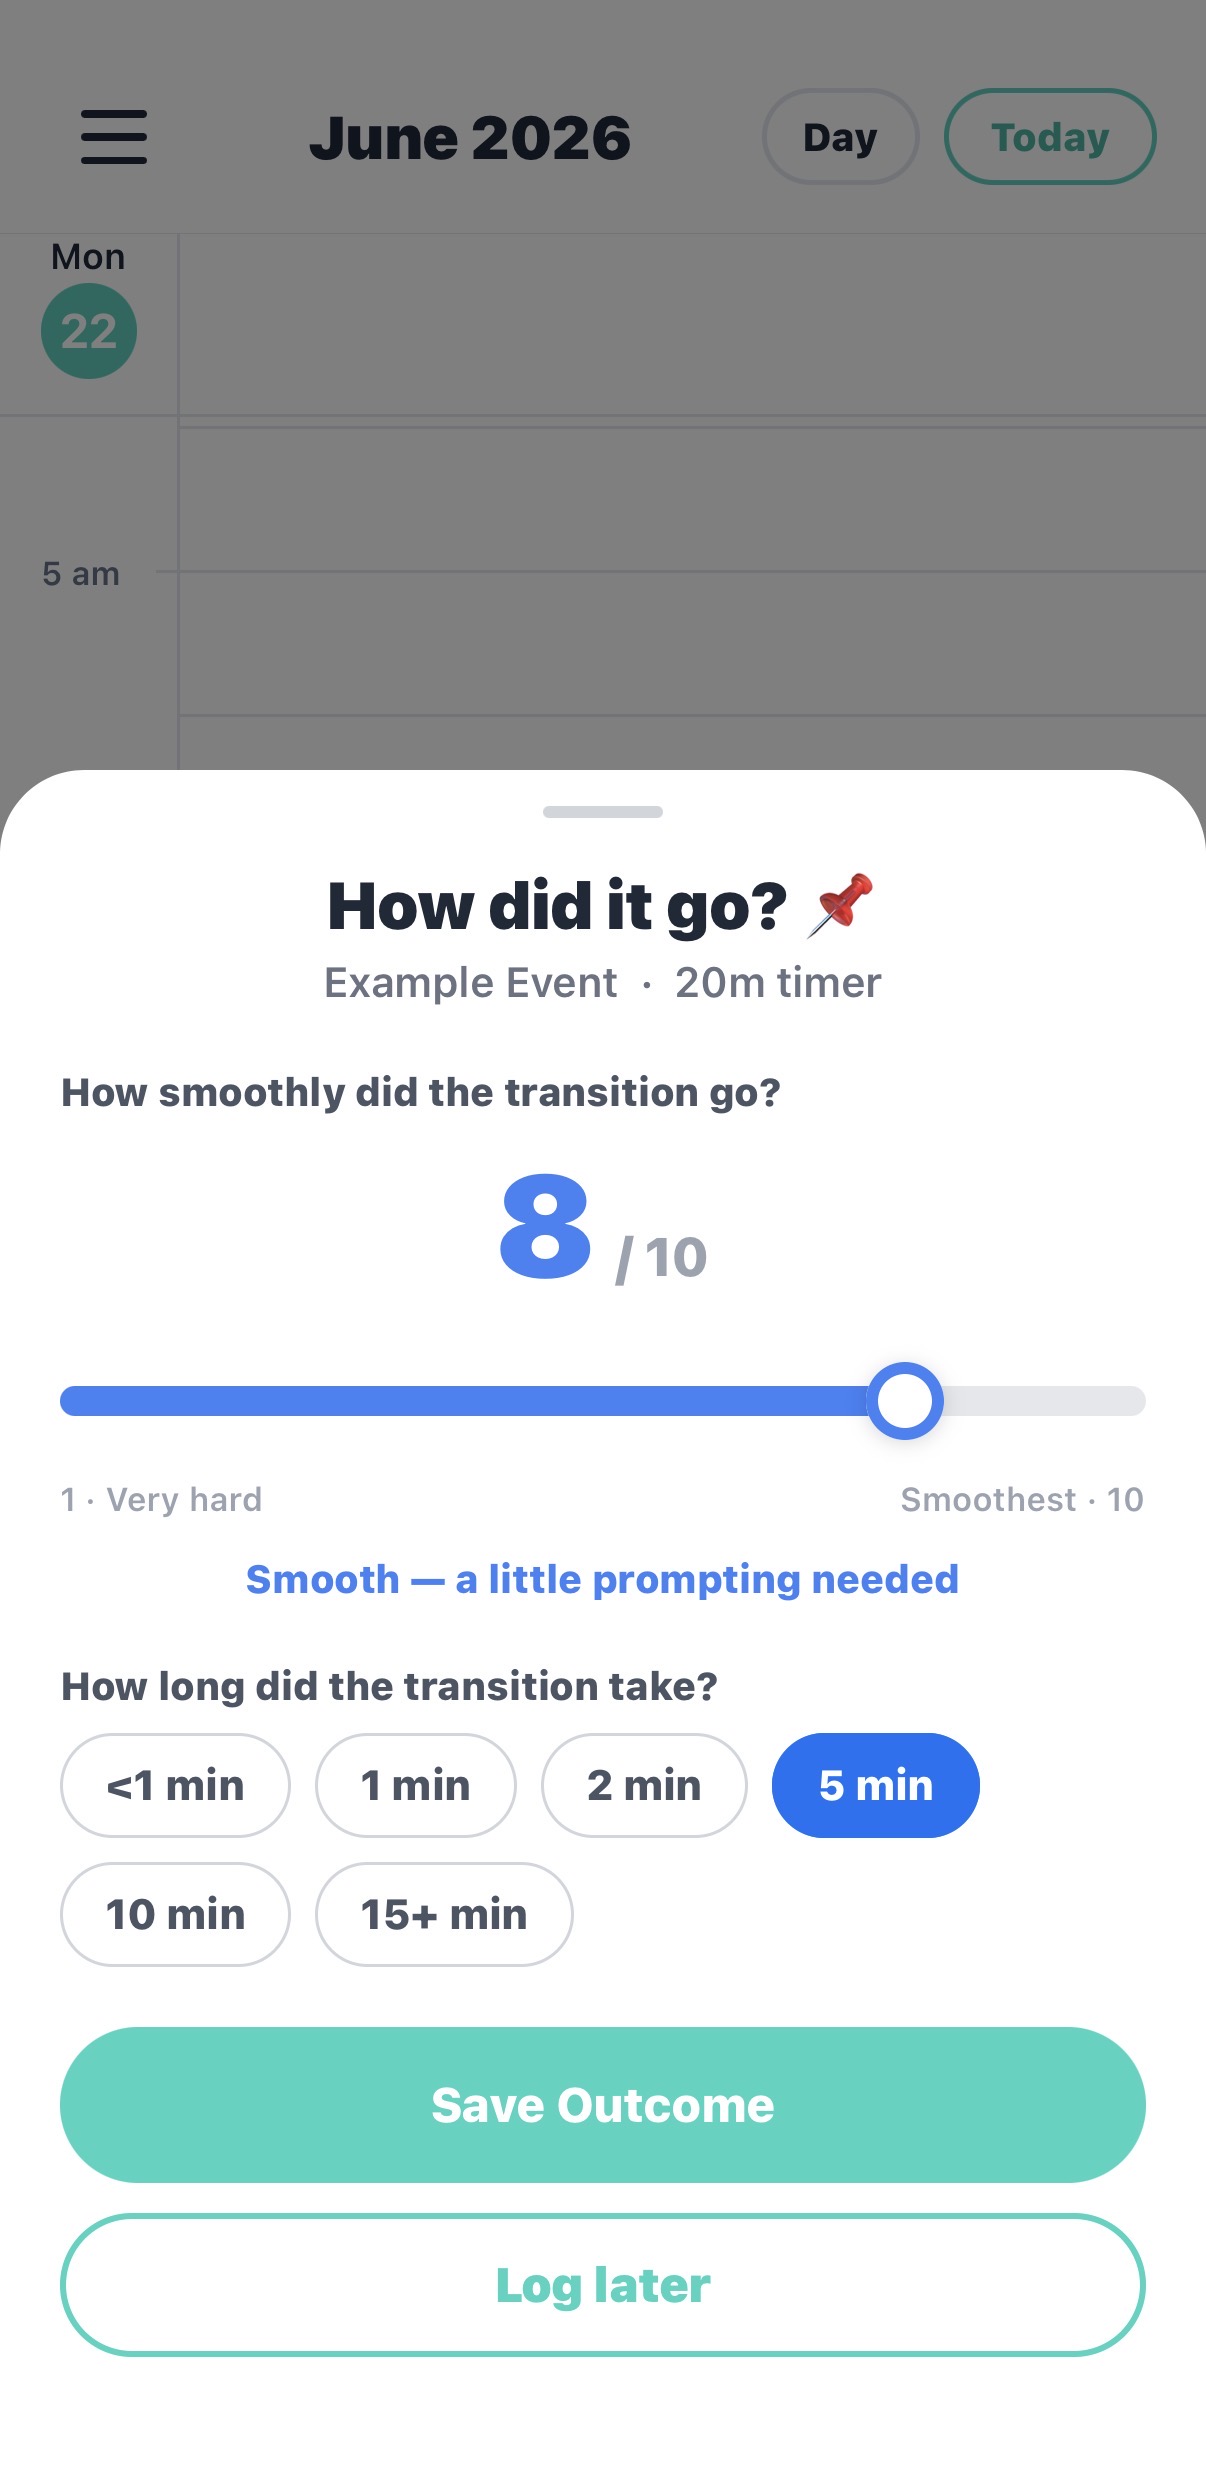
A few minutes after each event, the app prompts you to rate how the transition went. These ratings are the heart of the pilot — please complete them whenever you can.
- When the prompt appears, slide the scale from 1 to 10 — lower numbers for a harder transition (more upset or resistance), higher numbers for a smoother, more independent one.
- Try to rate a transition soon after it happens, while it is fresh. It only takes a moment.
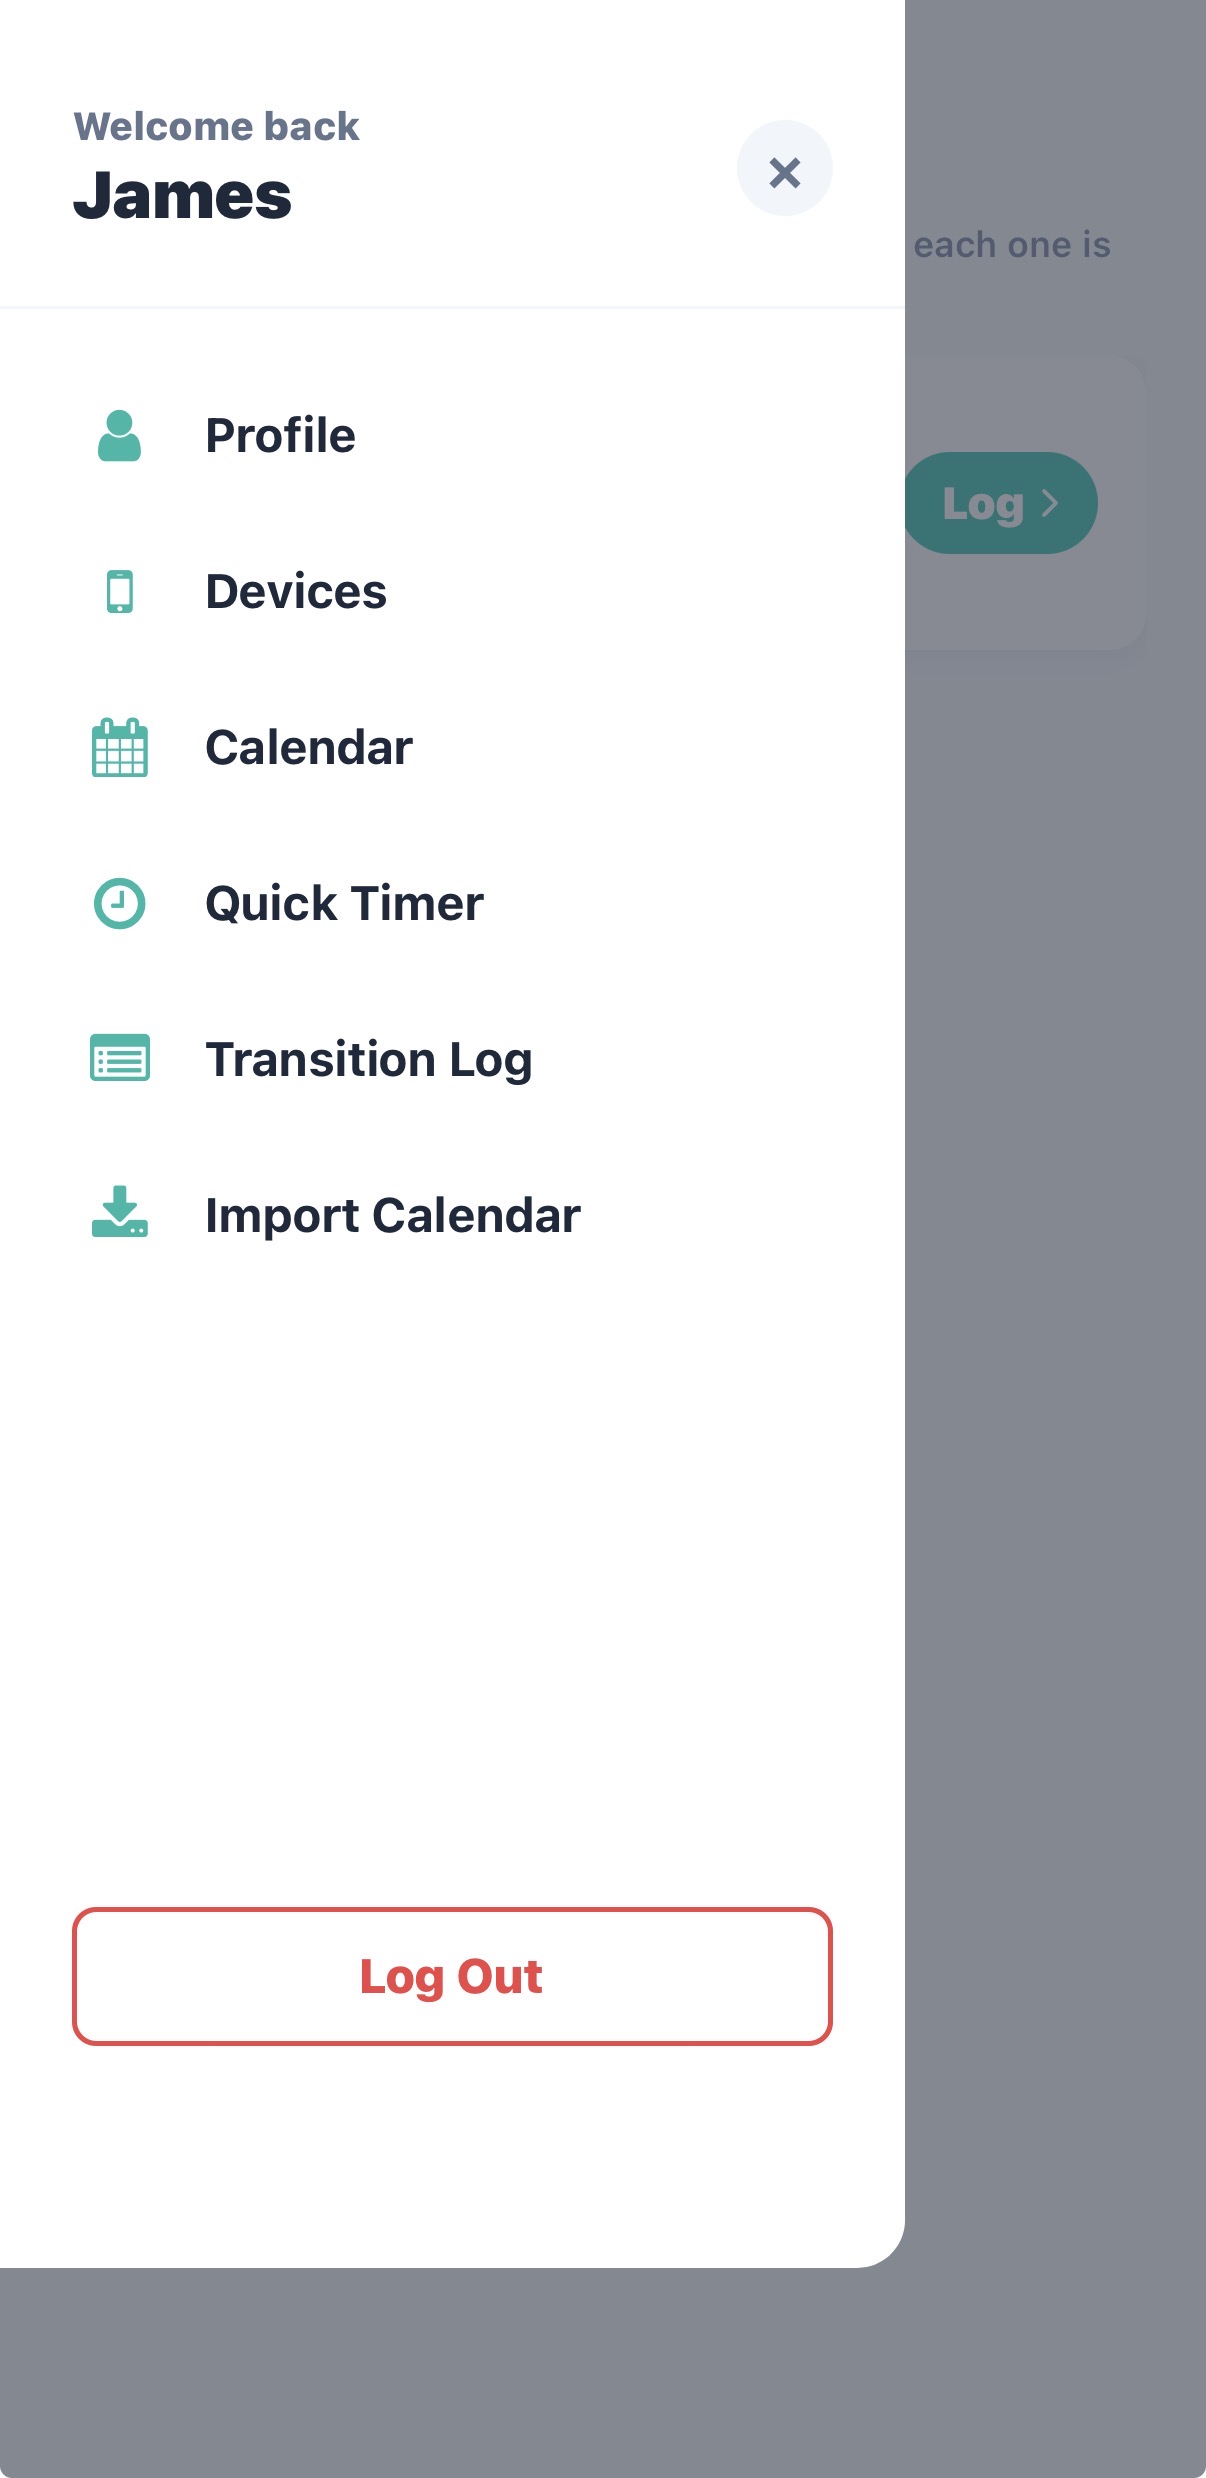
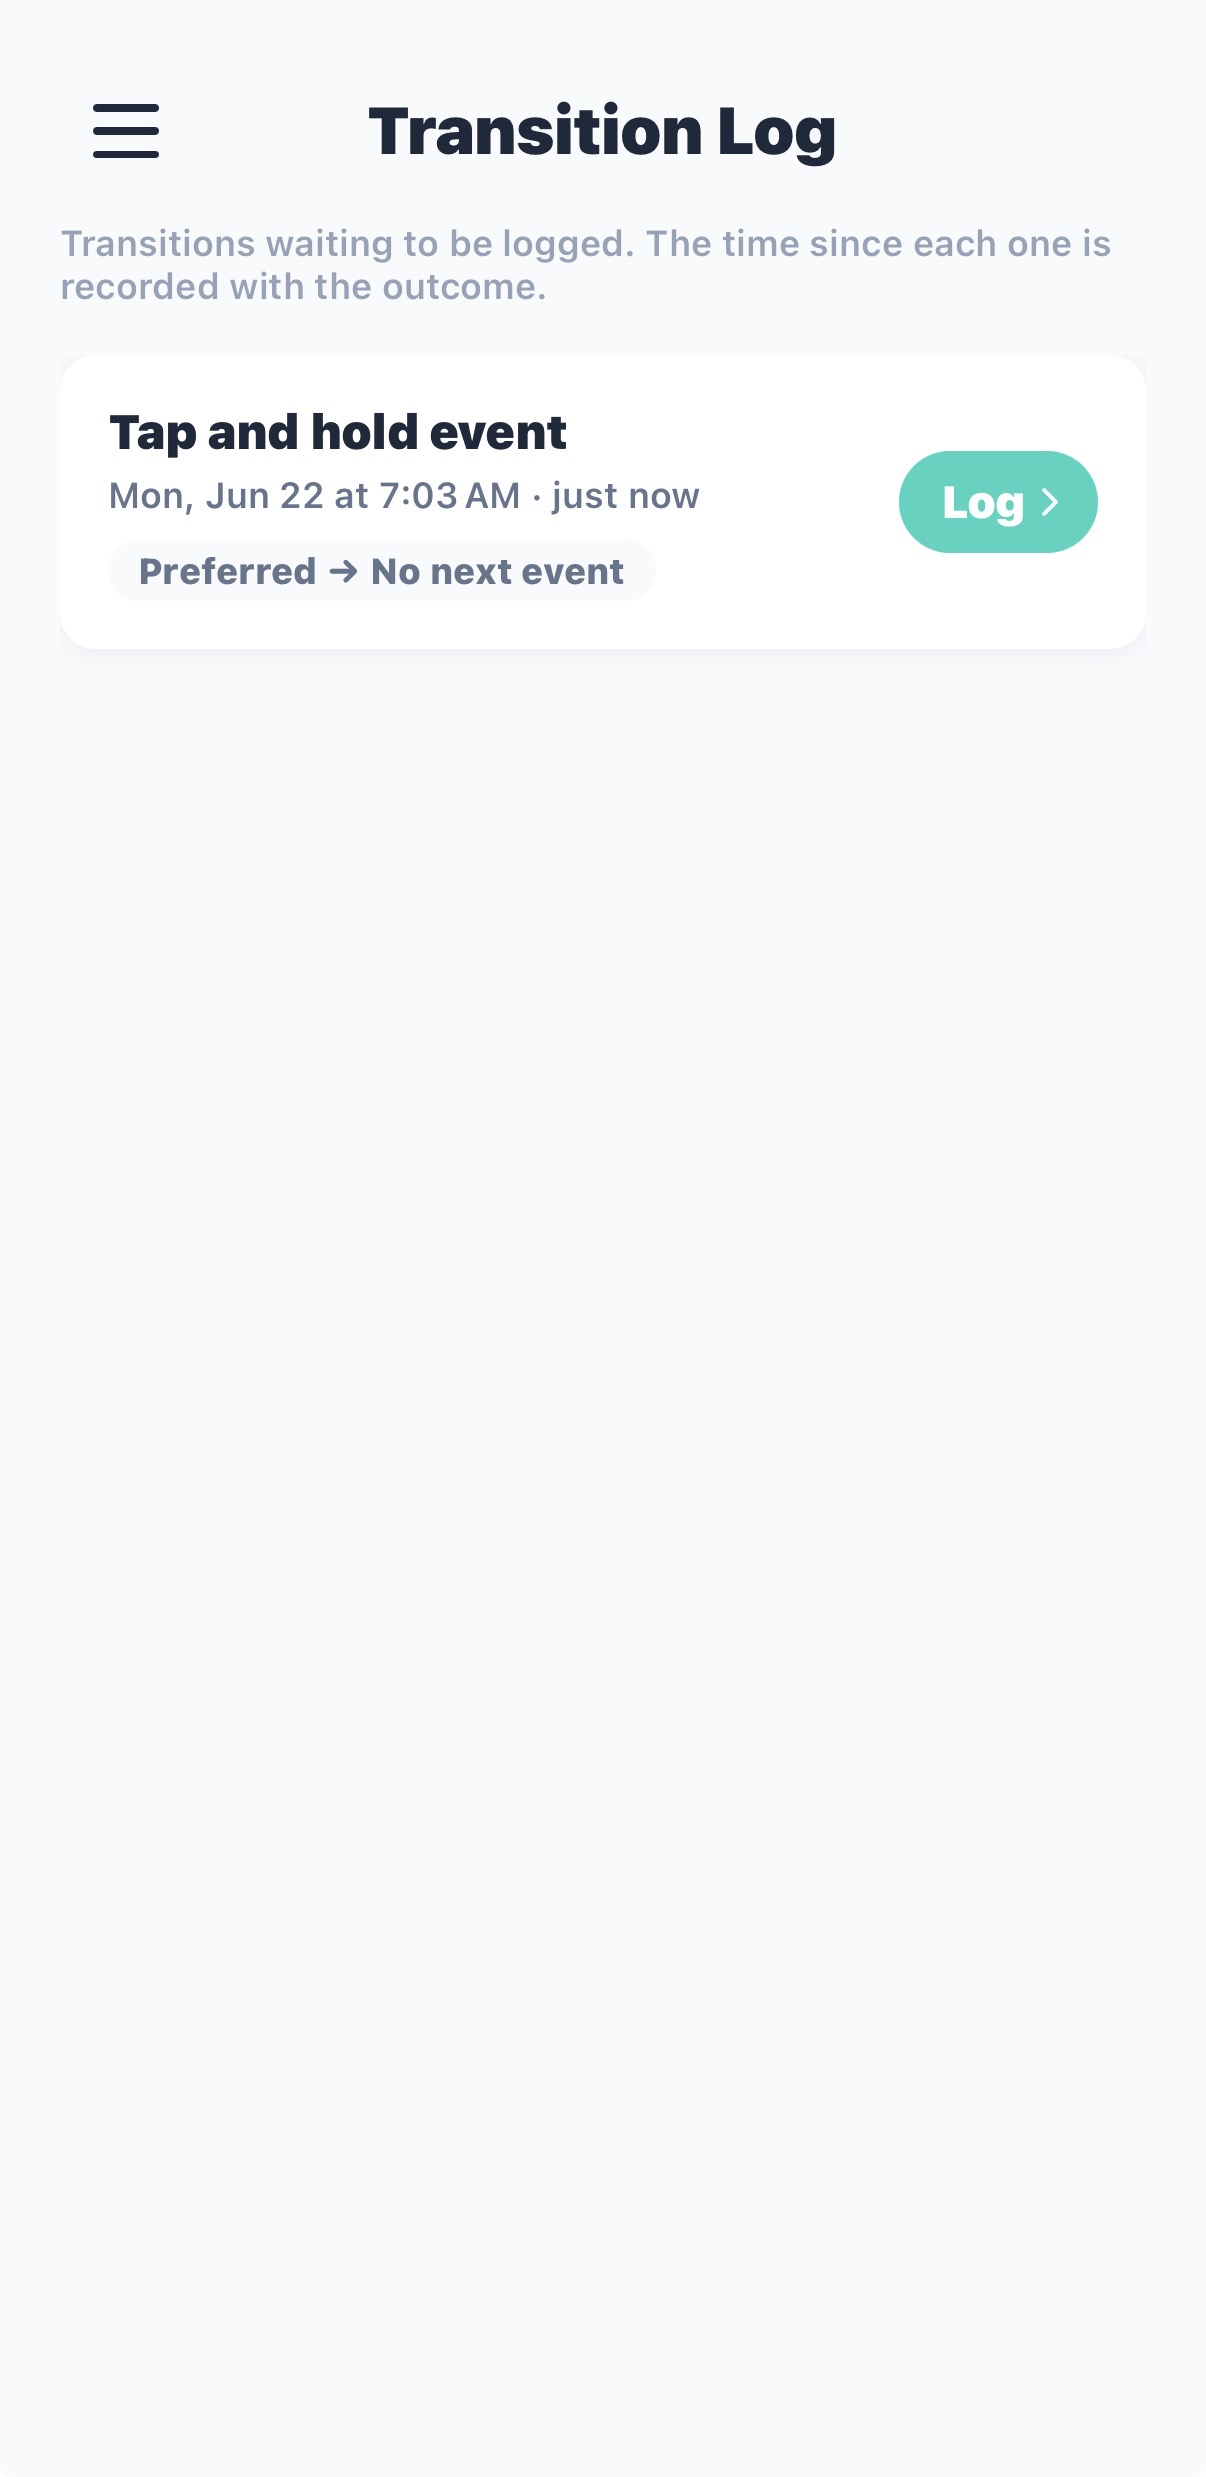
- Missed one? Open the Transition Log from the in-app menu to see any transitions you have not rated yet and add them when you have a chance.
6.Contact & Support
Questions, odd behavior, or need help? Reach out anytime — we're here to help.
| Contact | Details |
|---|---|
| Contact | James Spencer |
| contact@getmerfi.com |
Thank you for being part of the Merfi pilot. Your feedback helps us build something that truly helps families.