
Now that the two-week baseline is complete, your device arrives (or your clinic provides it). Pair it using the steps below, then keep creating events the same way — now the device delivers the cues.
Tip
Log and rate transitions the same way all pilot long. Only the device cues change after baseline.
1.What's in the Box
Check that everything below is in the box. If anything's missing, contact us right away.
- Merfi Smart Stuffy device
- Stuffed animal with external enclosure
- USB-C charging cable
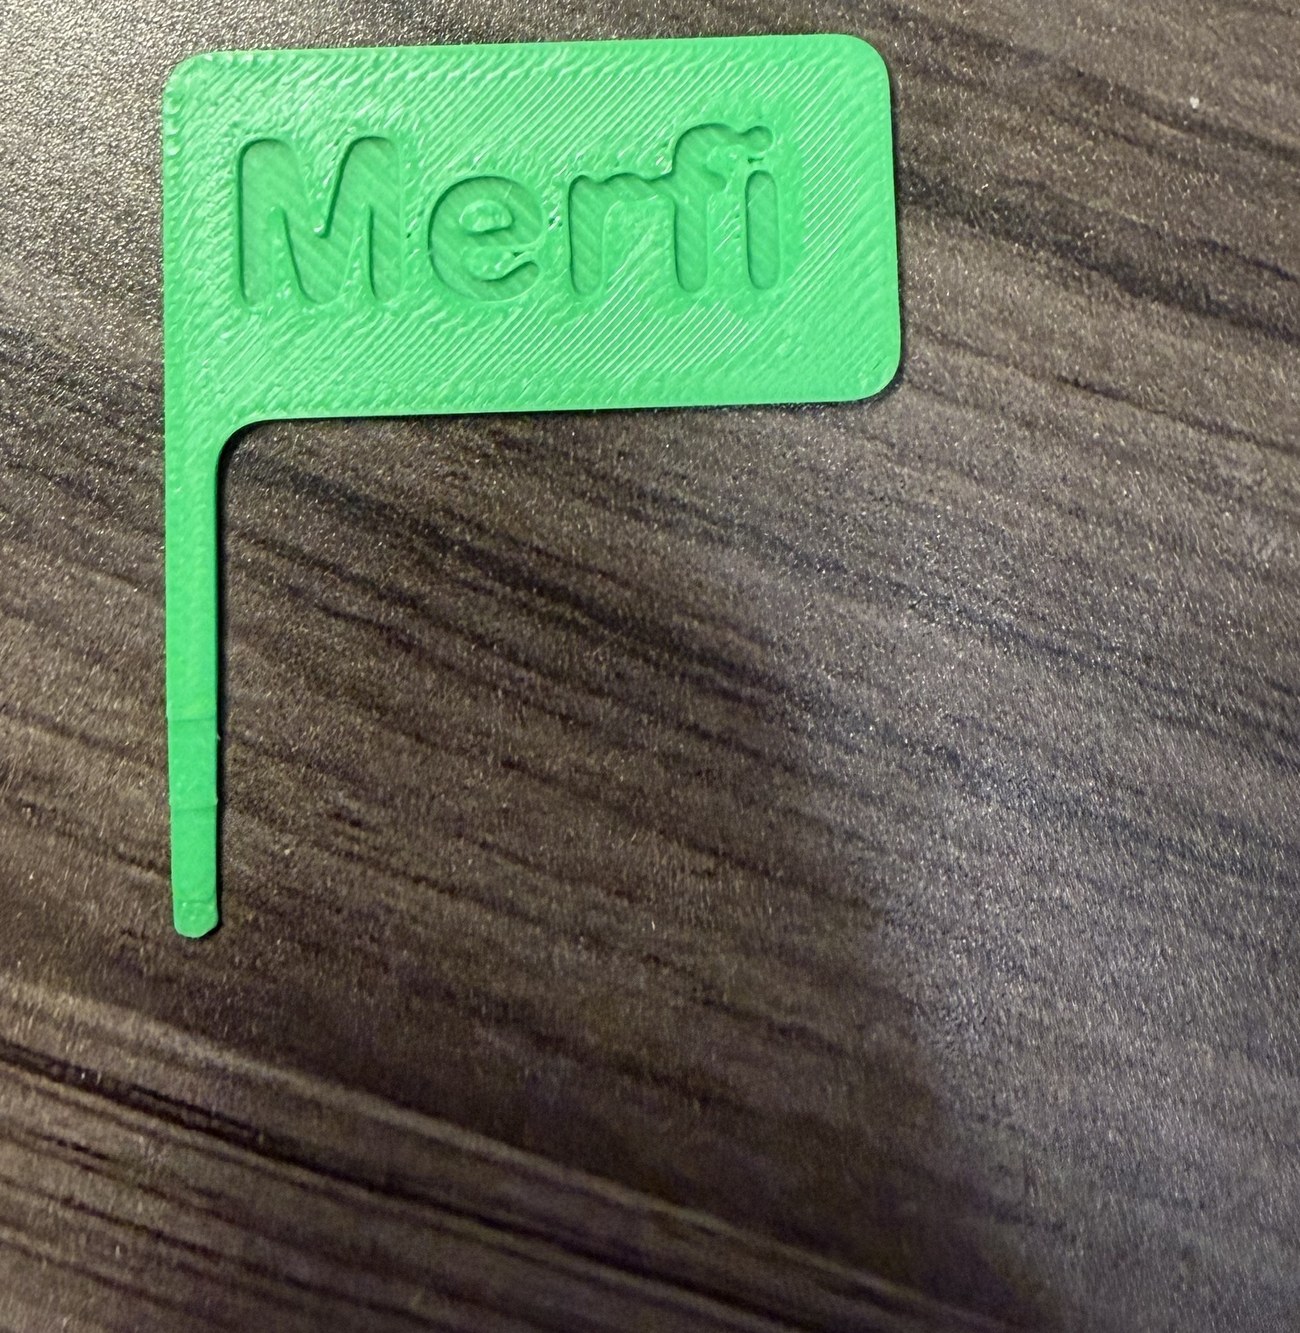
- Stylus (used to reach the power button and reset button on the device)
If something's missing or damaged
Do not attempt to use the device. Contact James Spencer at contact@getmerfi.com before proceeding.
2.Getting to Know Your Device
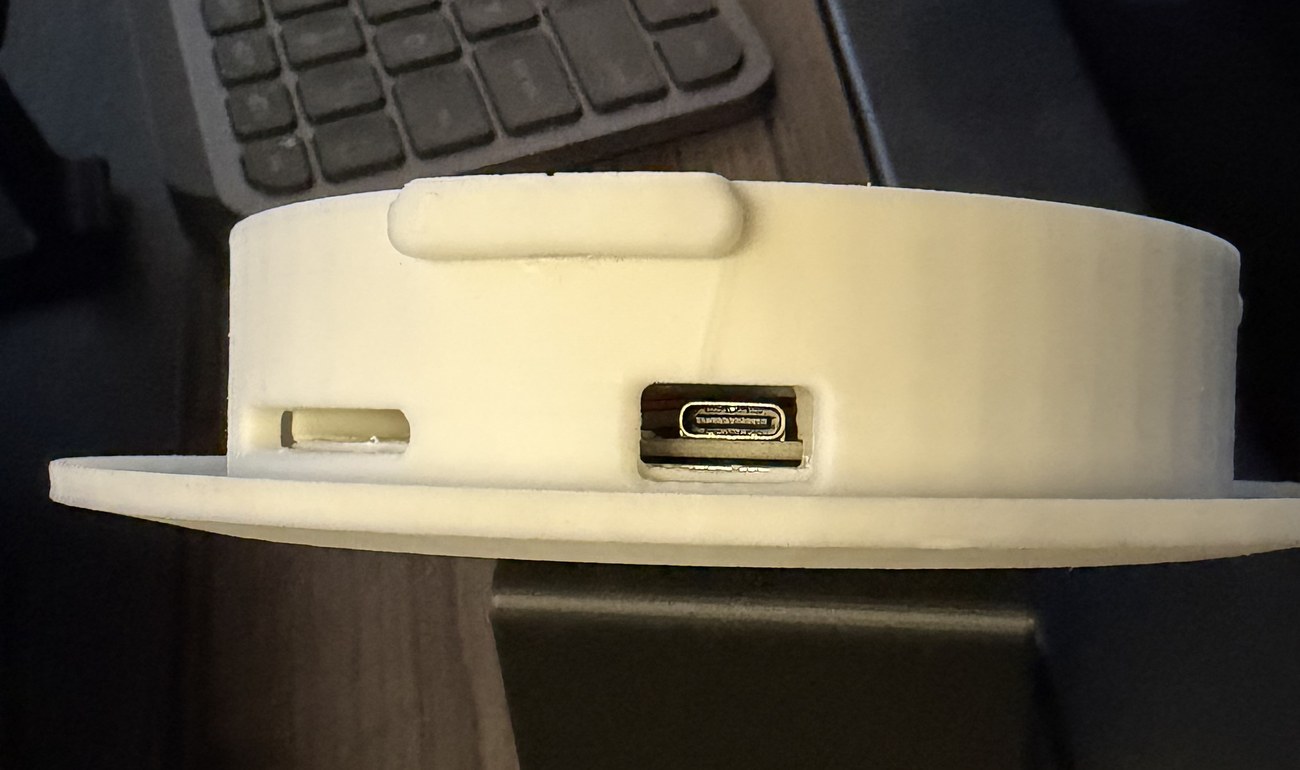
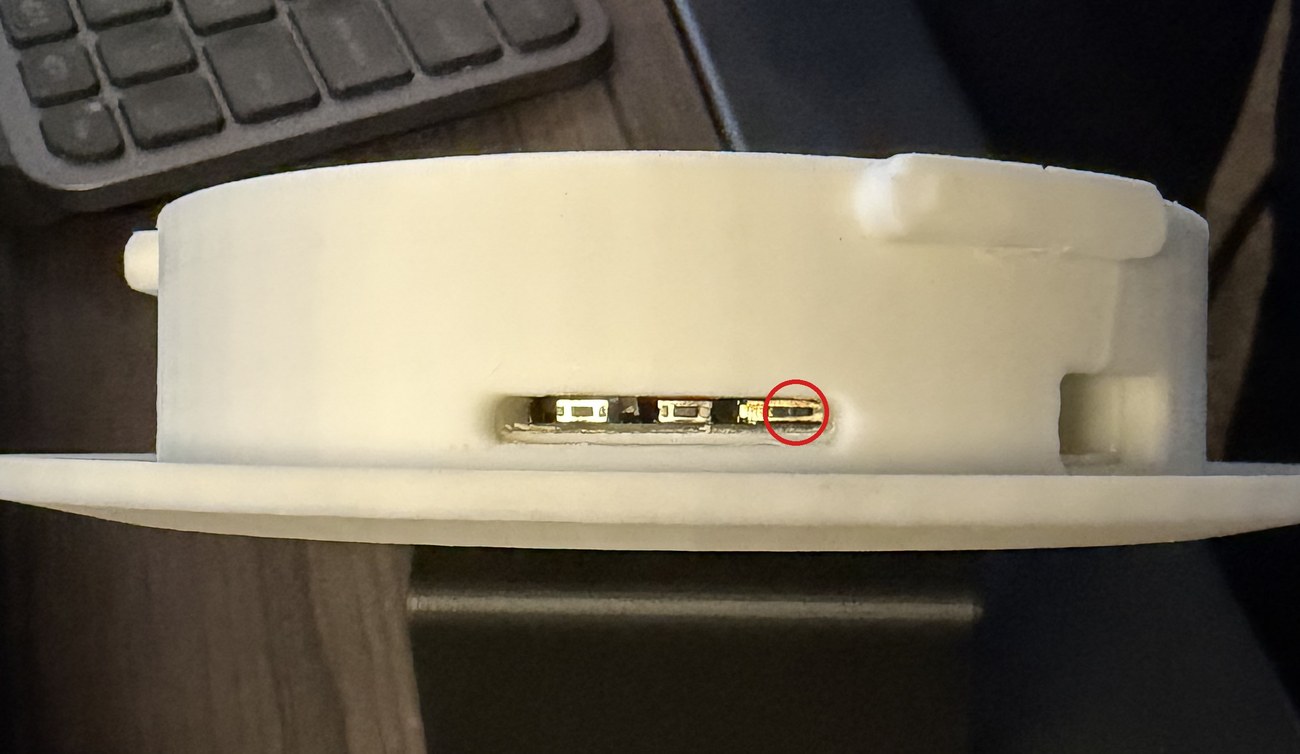
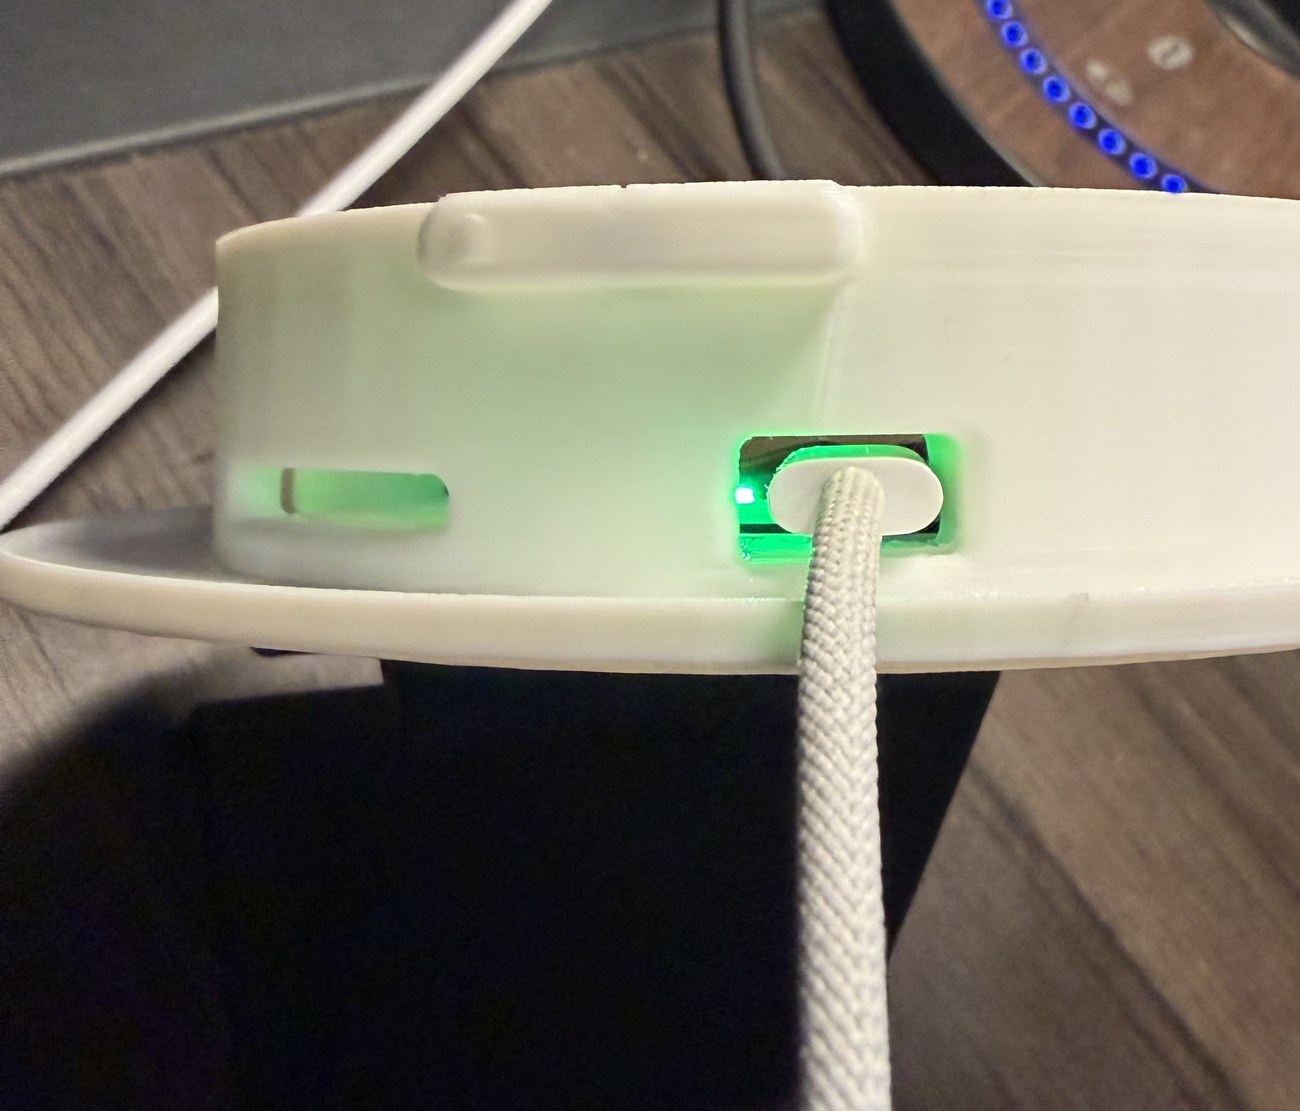
All ports and buttons are on the bottom edge of the round case, left to right:
- USB-C charging port — bottom right of the device
- Power switch — to the right of the charging port (use the stylus to switch)
- Reset button — to the right of the power button (use the stylus to press)
The device also includes:
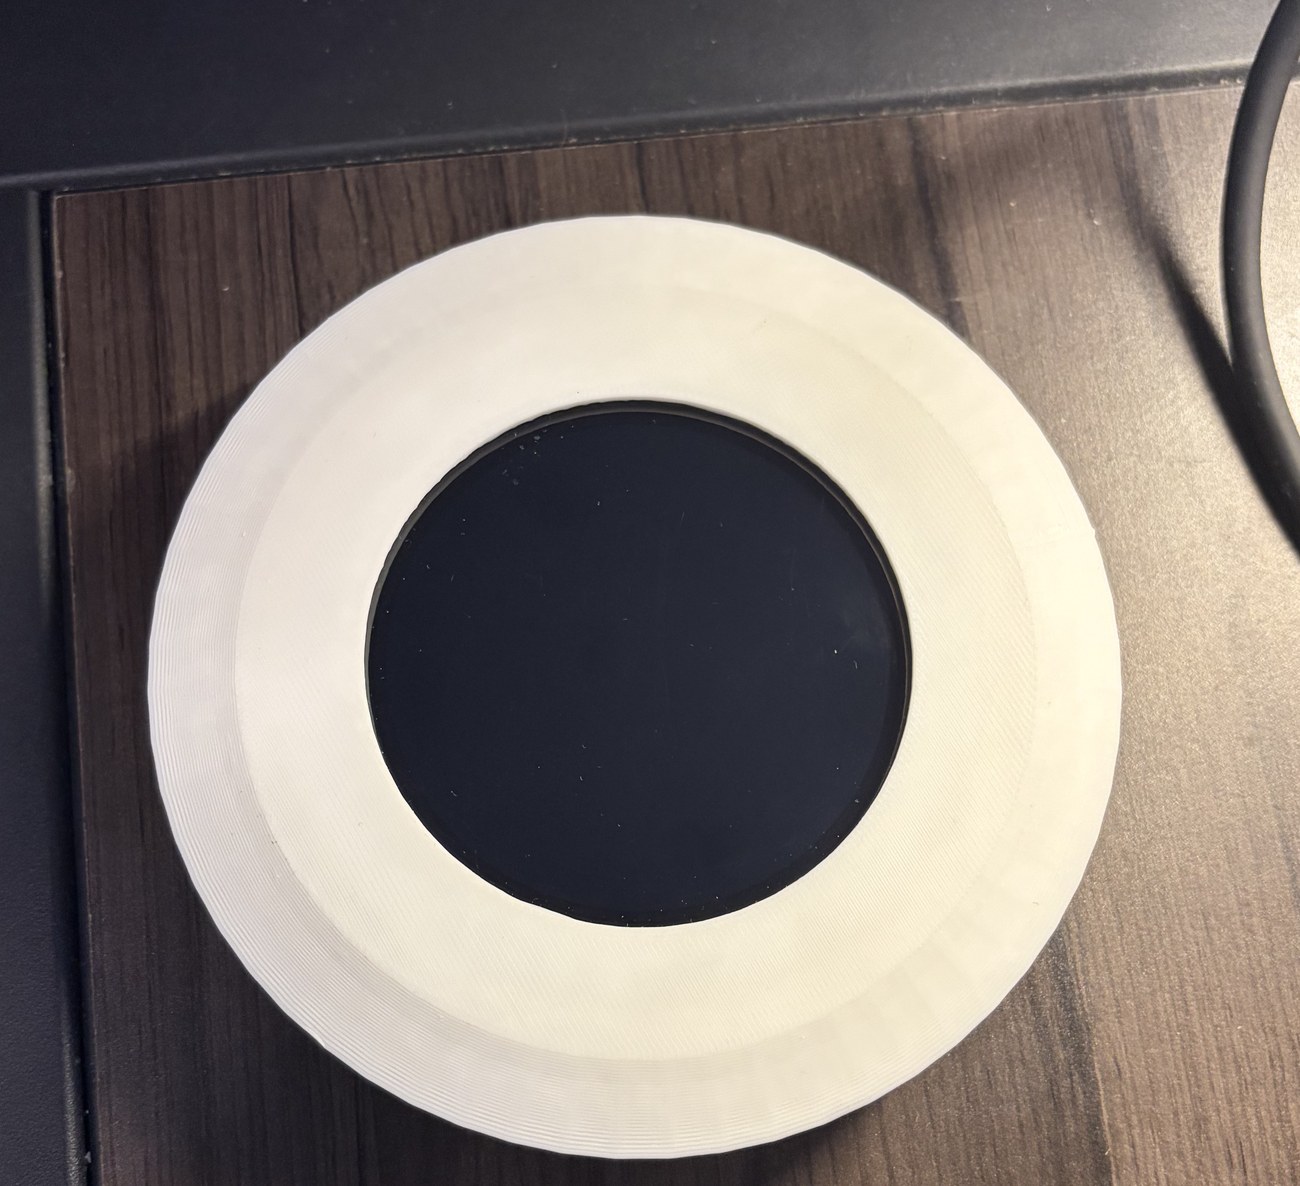
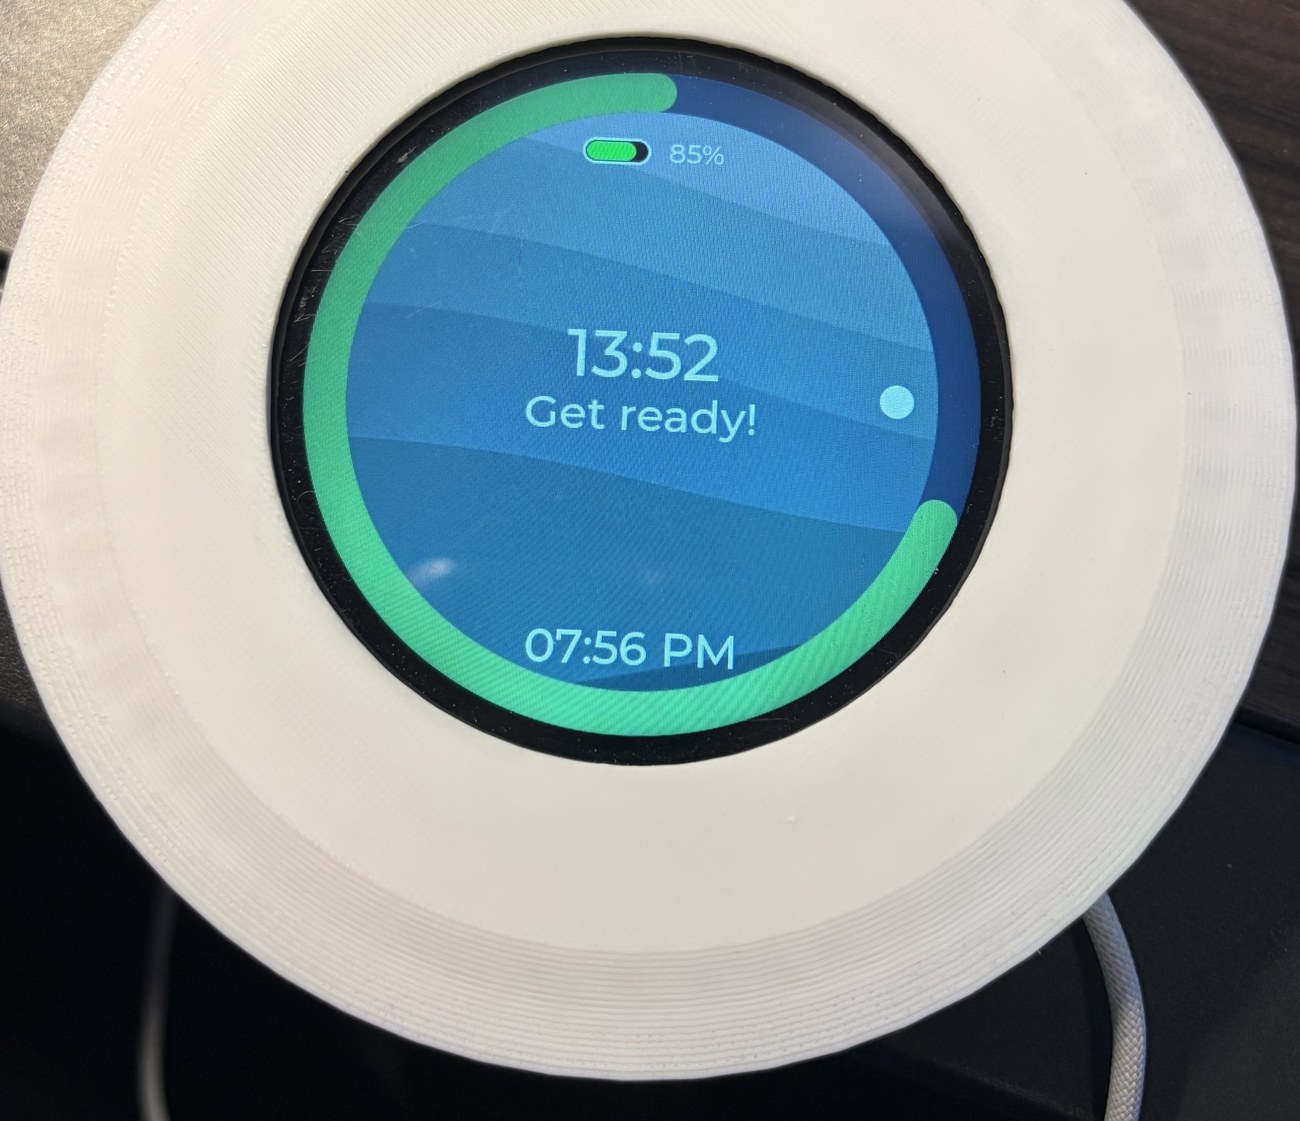
- A screen that displays the countdown timer during transitions
- A buzzer to deliver audio cues during and at the end of events
- A vibration motor to deliver vibration cues during and at the end of events
- A green LED indicator that glows through the case when the device is charging
⚠ Stylus Required
The power switch and reset button are recessed and cannot be reached by finger. Always use the included stylus to press these buttons.
3.Pair Your Device
- Make sure Bluetooth is enabled on your smartphone.
- Power on your Merfi device by turning on the power switch with the stylus.
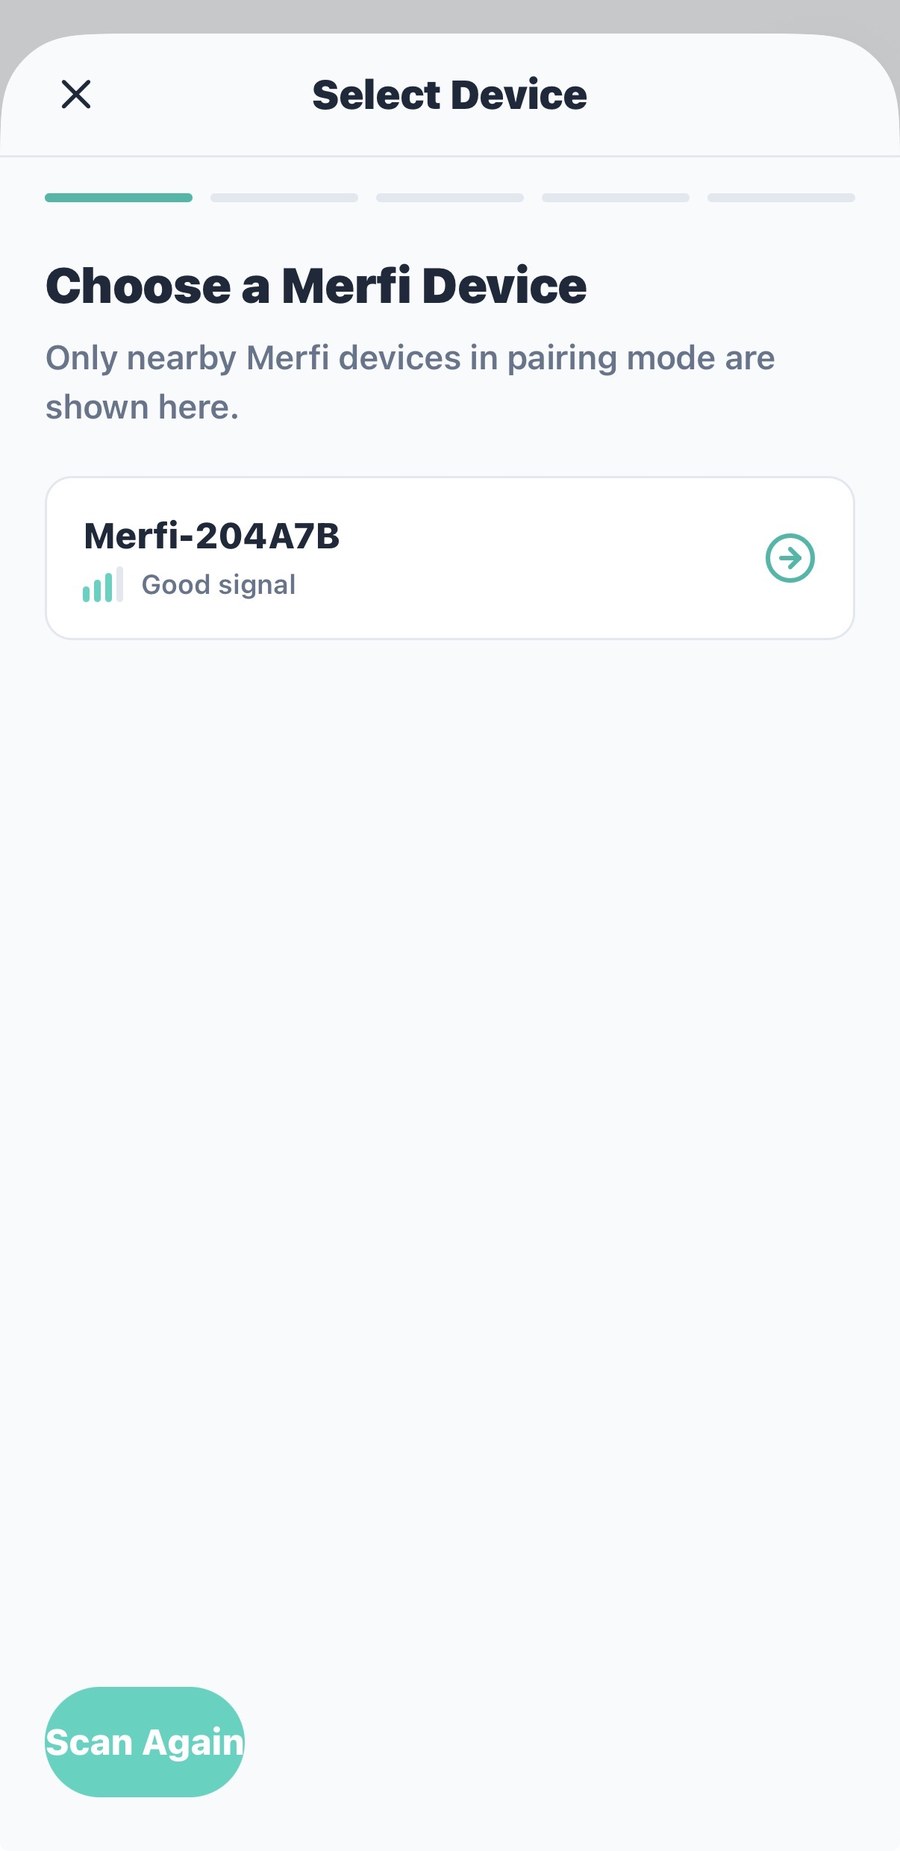
- In the app, navigate to Add Device and follow the on-screen pairing instructions.
- Give your device a name — this is especially helpful if you have more than one device.
4.Connect to Wi-Fi
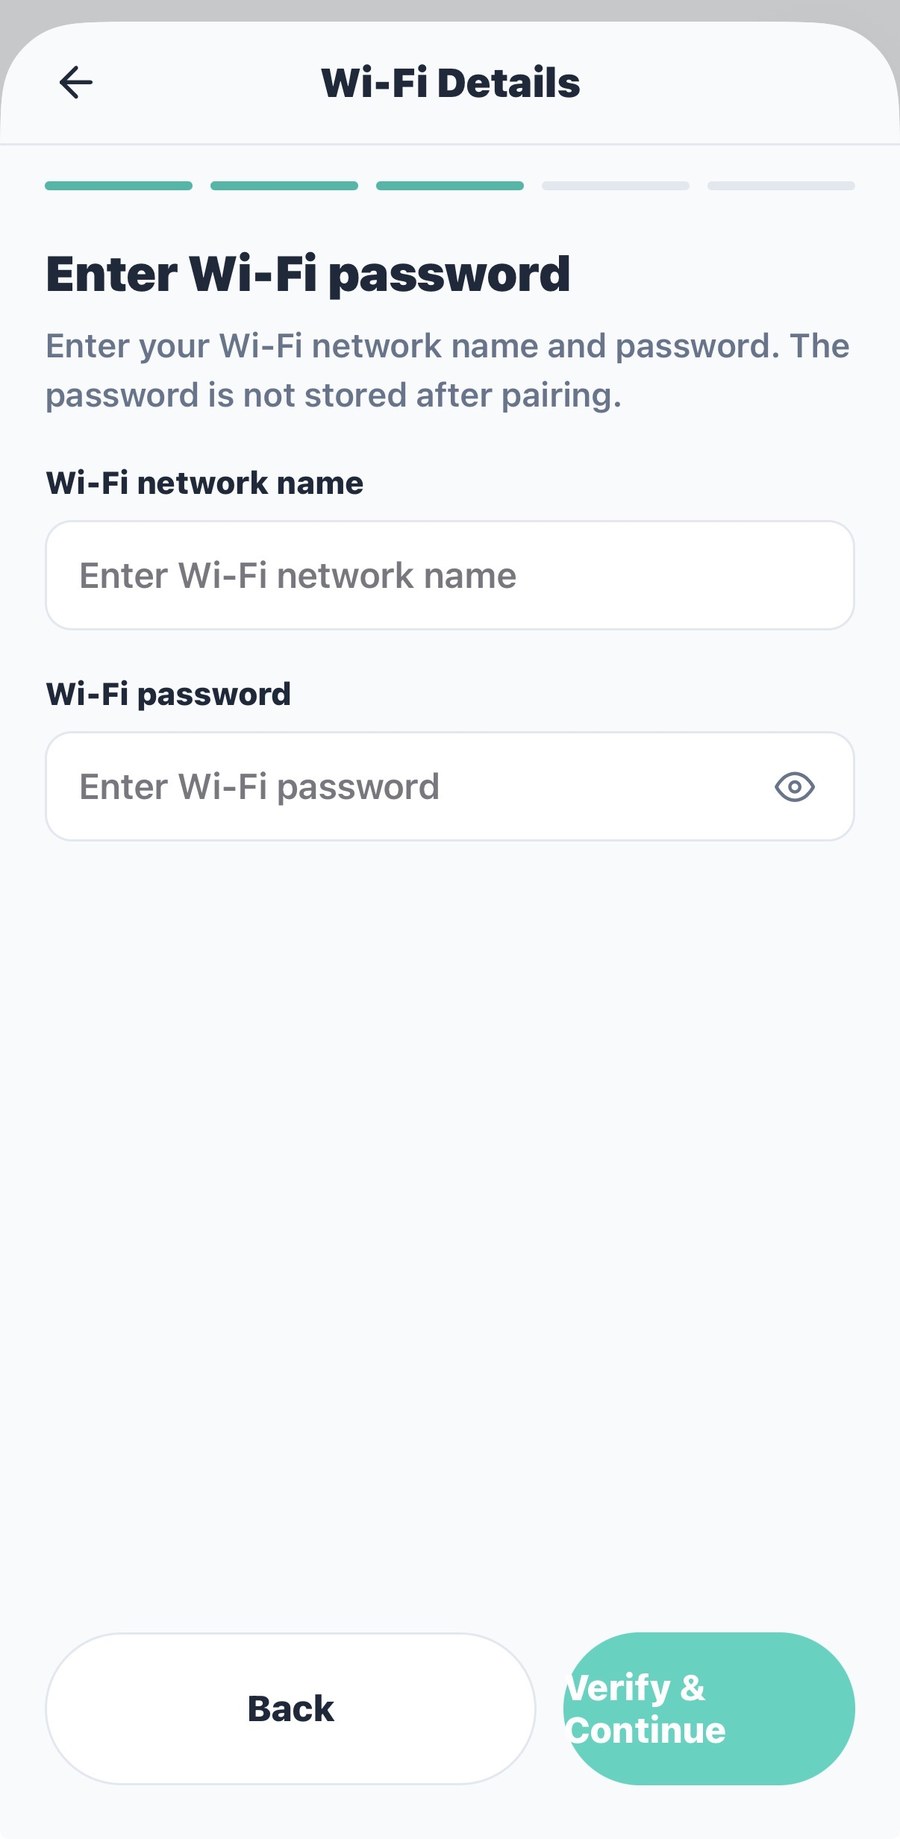
- When prompted, enter your home Wi-Fi network name and password.
- The device does not need Wi-Fi for daily use, but it will need Wi-Fi to receive firmware updates if our team releases a fix.
5.Attach the Device to the Stuffed Animal
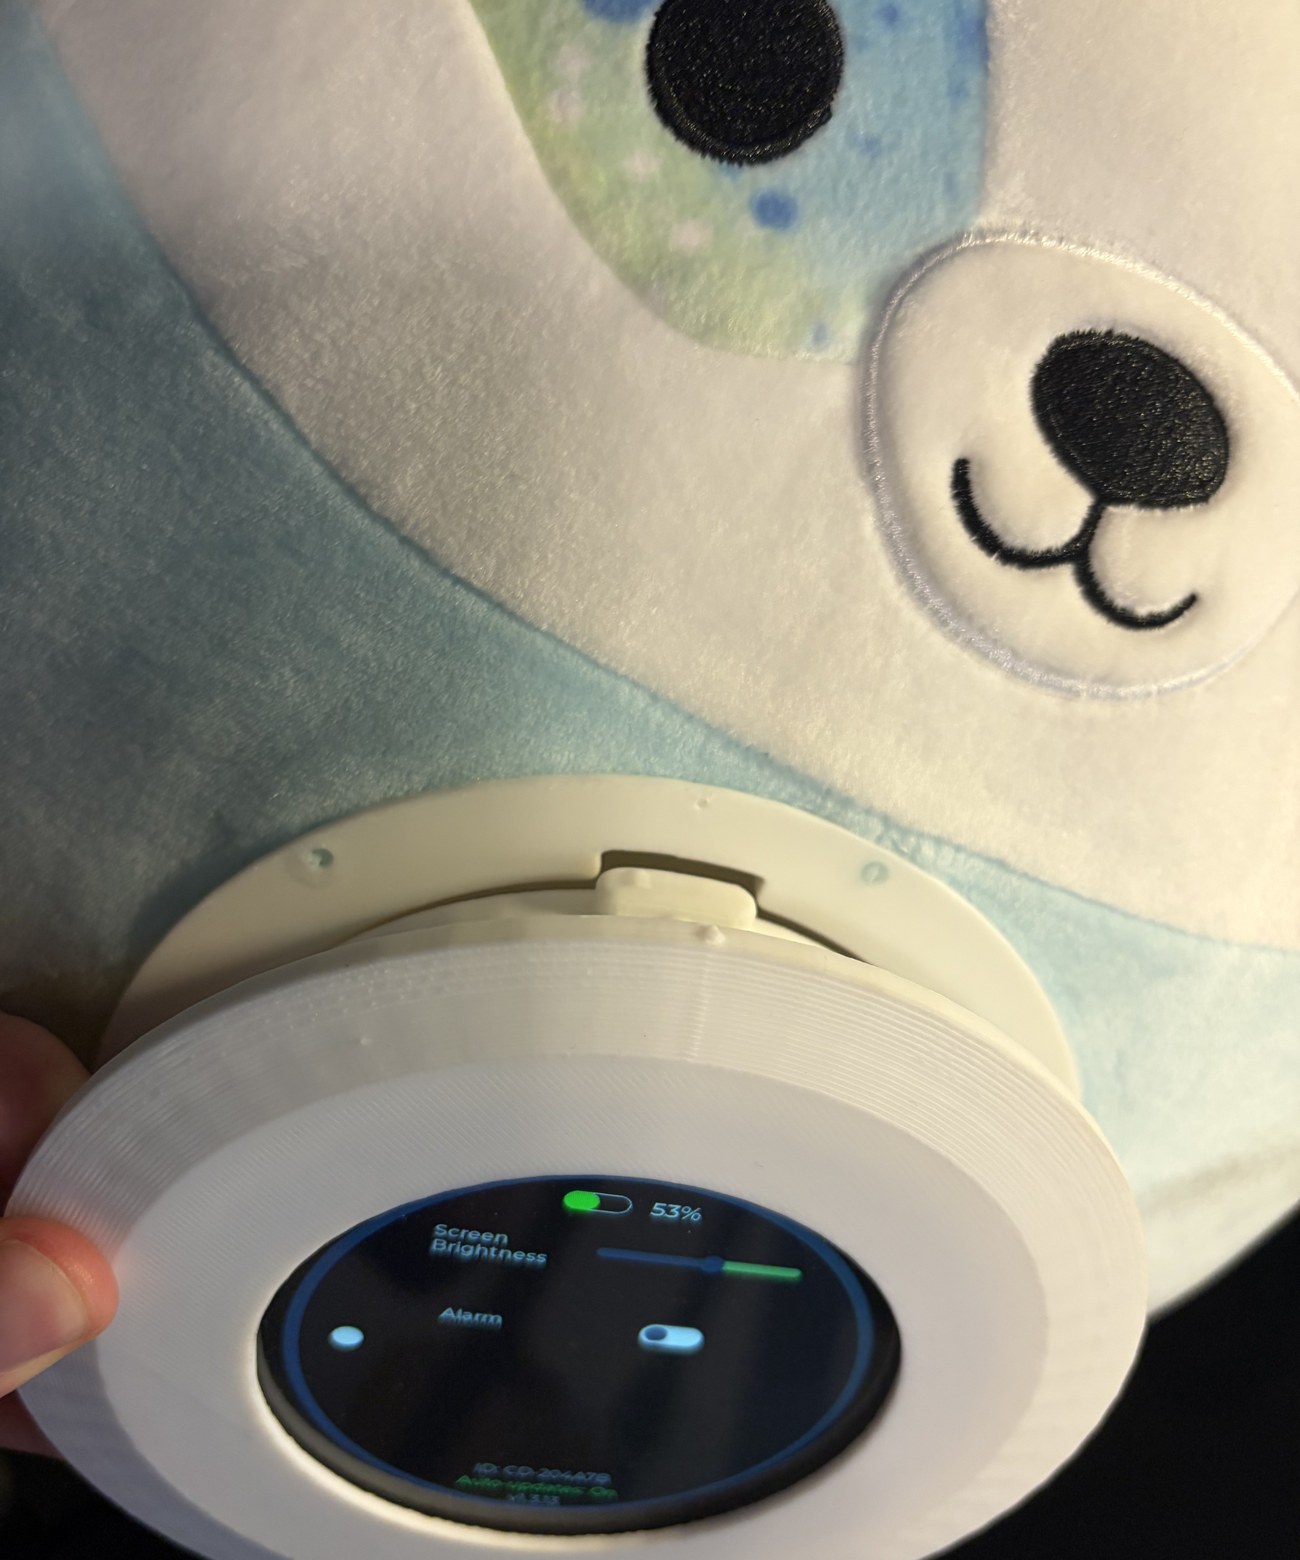
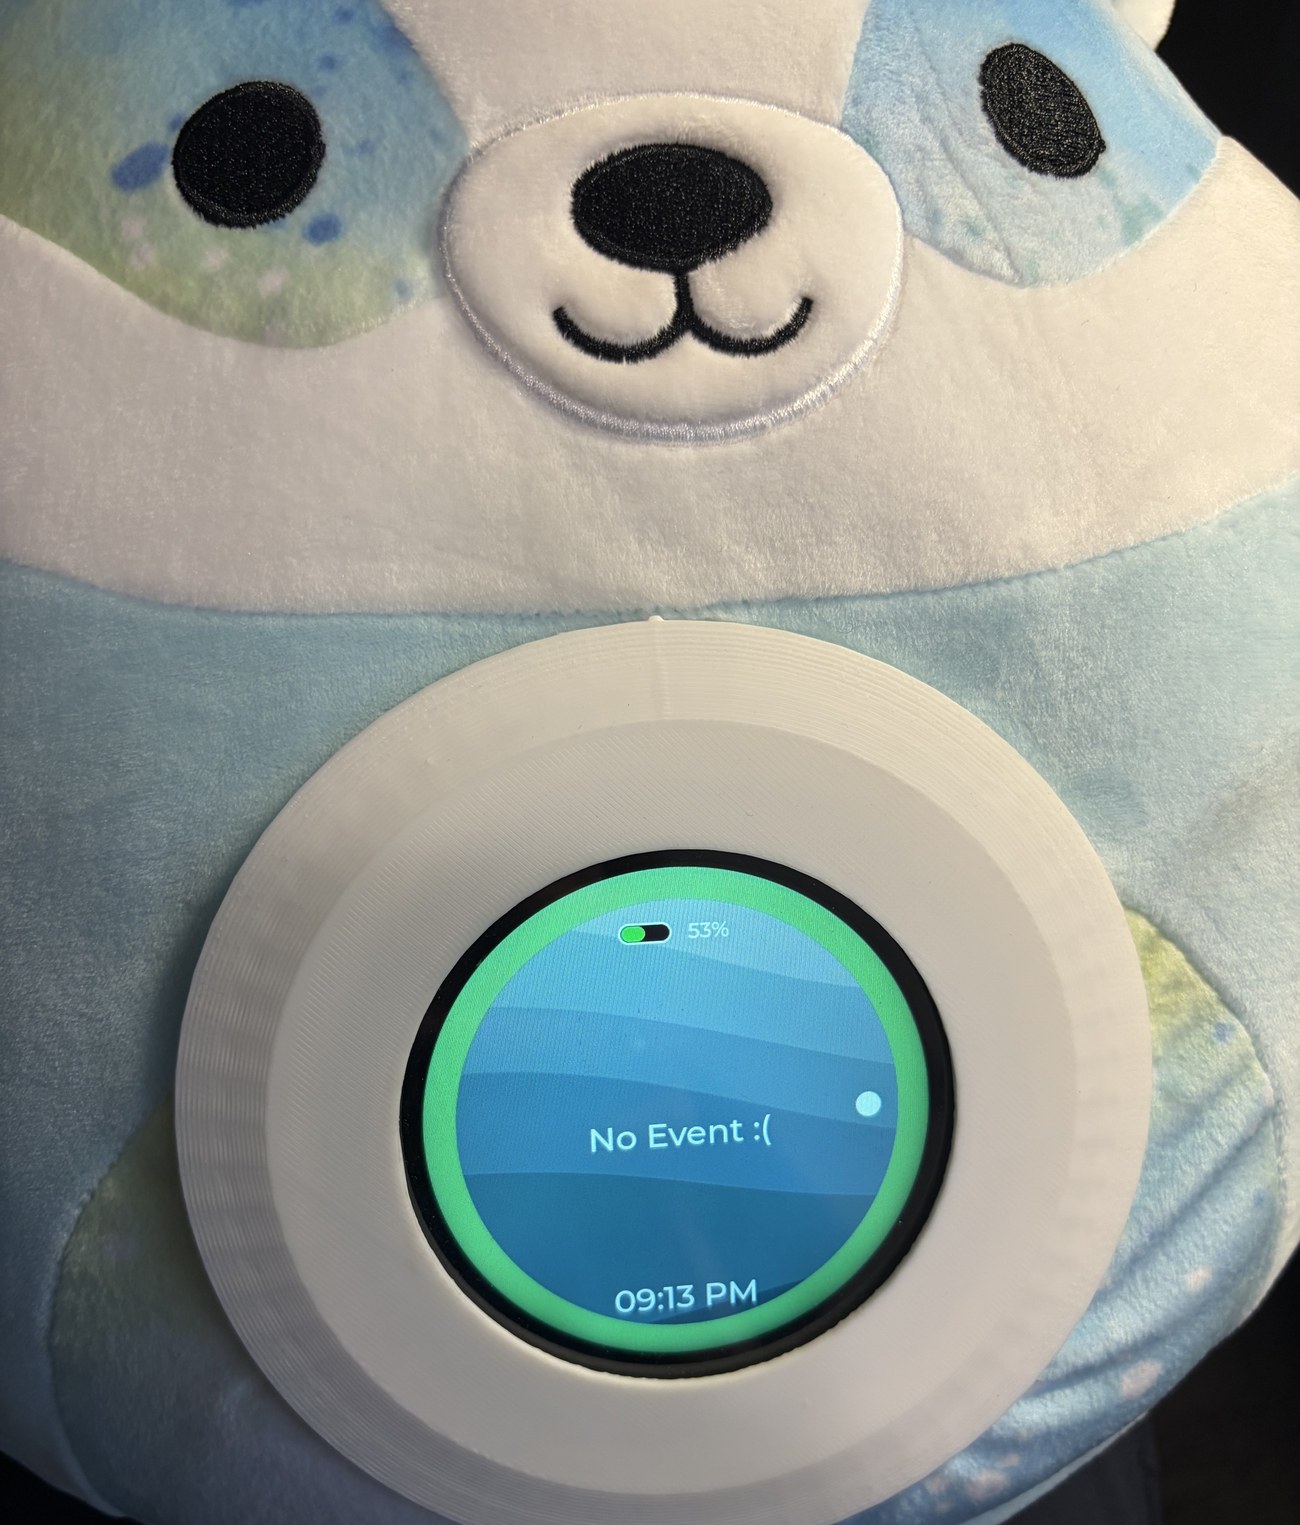
The device locks into the stuffed animal's enclosure with a twist-to-lock mechanism.
To Lock the Device In
- Hold the device with the screen facing you.
- Line up the tabs on the device with the slots on the stuffed animal's enclosure.
- Twist the device clockwise until you hear and feel a click. The click confirms the device is securely locked in place.
To Remove the Device
- Grip the device firmly.
- Twist counter-clockwise to unlock, then pull the device free.
6.Charge the Device
Charge once a day, ideally overnight. A full charge lasts about 24 hours of average use.
How to Charge
Before you start
You will need to remove the device from the stuffed animal each time you charge it. The charging port is not accessible while the device is locked in the enclosure.
- Remove the device from the stuffed animal by twisting counter-clockwise.
- Plug the included USB-C cable into the charging port on the bottom right of the device.
- Connect the other end of the cable to a USB power adapter or USB port.
- Confirm charging — a green LED will glow through the case, and the battery indicator in the app will also show that the device is charging.
Only one port
The USB-C port is the only port on the device. Always use the included cable to avoid compatibility issues.
Why the battery percentage jumps around while charging
Due to the type of development board we're using, the exact charge percentage is unknown while the device is plugged in — we estimate it from the battery's remaining current, so the number you see can shift or look approximate during charging. To be sure you have a full charge, leave the device plugged in for at least an hour.
7.How Events Cue Your Child on the Device
- At each staged alert, the device screen wakes up (if it was asleep) and displays the countdown.
- The countdown appears as a shrinking ring around the screen, along with a number clock counting down.
- A visual countdown, two beeps, and a vibration accompany each staged alert.
- When the final transition moment arrives, the device delivers four beeps and a vibration.
Let the device cue your child first, before any verbal reminder. The goal: your child starts the transition on their own.
Editing a scheduled event
The device runs events independently once they have been synced to it. However, if you want to add, edit, or update a scheduled event, the device will need to be within Bluetooth range of your phone to receive the update.
8.Tips for Getting the Best Results
- Start with transitions your child already finds manageable — small wins build confidence with the device.
- Let the device do the prompting first. Wait to see if your child responds before adding a verbal reminder.
- Be consistent. Using the device for the same transitions each day helps your child learn to anticipate and trust the cues.
- Watch for the periodic check-in surveys our team sends and complete them when they arrive. Your feedback is one of the most important parts of the pilot.
- Reach out anytime you notice something unexpected — we want to hear from you.
9.Troubleshooting
Common issues and fixes are below. Still stuck? Contact us at contact@getmerfi.com.
| Issue | How to Resolve |
|---|---|
| Device is slow or unresponsive | Press the reset button using the stylus. The device will restart and return to normal. Your scheduled events are stored on the device and will not be lost. |
| A scheduled event does not appear on screen during a transition | The event was likely not assigned to the correct device when it was created. Open the app, find the event, check the Device field, and re-save it. Make sure the device is within Bluetooth range to receive the update. |
| Device will not power on | Check that the battery is charged. Connect the USB-C cable and charge for at least 30 minutes, then press the power button with the stylus again. If the green LED does not appear during charging, try a different USB power source or cable. |
| Device is not pairing with the app | Make sure Bluetooth is enabled on your phone. Power the device off and back on using the stylus, then attempt pairing again from the app. If pairing still fails, press the reset button and try once more. |
| My clinic code is not accepted at account setup | Re-check the code your clinic coordinator gave you and enter it exactly (it is not case-sensitive). Make sure your phone has an internet connection, since the app verifies the code online. If it still will not accept, confirm the code with your coordinator or contact us at contact@getmerfi.com. |
| Green charging LED is not showing | Try a different USB-C cable or a different power adapter. Confirm the cable is fully seated in the port. If the issue continues, contact support. |
| Firmware update needed | If our team releases a fix, the device will download it automatically when powered on and connected to Wi-Fi. Make sure the Wi-Fi credentials entered during setup are still correct. |
10.Returning Your Device
The device is on loan for the pilot. When it ends, we'll send simple instructions for returning the device and stuffed animal (unless we've arranged for you to keep it).
At the end we may deactivate your device and account remotely. If it stops connecting or you're signed out with a pilot-ending message, that's expected — it's time to return the device. Your data is unaffected.
11.Contact & Support
Questions, odd behavior, or need help? Reach out anytime — we're here to help.
| Contact | Details |
|---|---|
| Contact | James Spencer |
| contact@getmerfi.com |
Thank you for being part of the Merfi pilot. Your feedback helps us build something that truly helps families.